
Birthdays are a time for fun in our home! With two creative girls, I’ve found the top 10 birthday crafts that are easy and fun. These crafts include vibrant decorations and cool party favors. They use simple materials and have clear instructions for everyone to join in.
Let’s get ready with scissors, glue, and paint for a fun crafting day! For more ideas, check out my post on Extremely Creative Clothespin Craft Ideas for Kids to Make & Enjoy!!
1. Decorative Cupcake Toppers
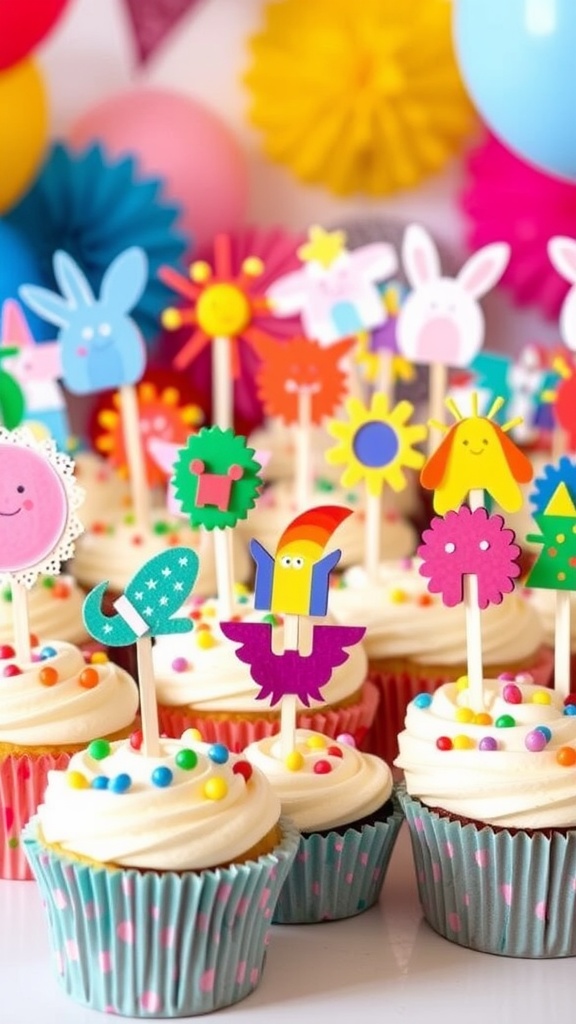
Decorative cupcake toppers can make a birthday feel extra special! Imagine a tray of colorful cupcakes with fun, themed toppers. My two girls and I love making these treats together!
To start, you’ll need some basic stuff: colored cardstock, scissors, glue, and wooden skewers. You can also use stickers or markers for extra flair. Set everything out on a table where the kids can work freely.
Now, let’s have fun! First, cut out shapes from the colored cardstock. Think bunnies, flowers, and suns! My girls also like drawing their own shapes. Next, glue the shapes onto the wooden skewers. Let it dry a bit.
While waiting, decorate your cupcakes! When the toppers are dry, stick them into the cupcakes. See how the cupcakes become a festive display! The kids will be so proud of their creations. These activities are great for birthday parties and can be customized for any theme.
2. Homemade Birthday Cards

Making homemade birthday cards is such a fun way to celebrate! My two girls love to get creative and add their personal touches. The best part is that each card is unique and shows how much you care.
To start, here’s what you’ll need: colorful cardstock, markers, stickers, glue, scissors, and any other fun decorations you have at home. You can use items like glitter, buttons, or even small candies for added flair!
First, take a piece of cardstock and fold it in half to create a card. Let your kids decide how they want to decorate the front. They can draw cute pictures, write a special message, or stick on some fun stickers. The options are endless!
Next, it’s all about adding flair! Encourage them to use markers to write “Happy Birthday” in bright colors. They can even add some doodles around the text. My girls love to add little hearts and stars!
Once they’re happy with the front, let’s add a personal touch inside the card. This could be a sweet note or a fun memory they share with the birthday kid. It makes the card even more special.
Finally, let the cards dry and they’re ready to gift! Watching my girls create these cards brings so much joy. Homemade birthday cards are a great way for kids to express their creativity and show their love.
3. Memory Jar Craft
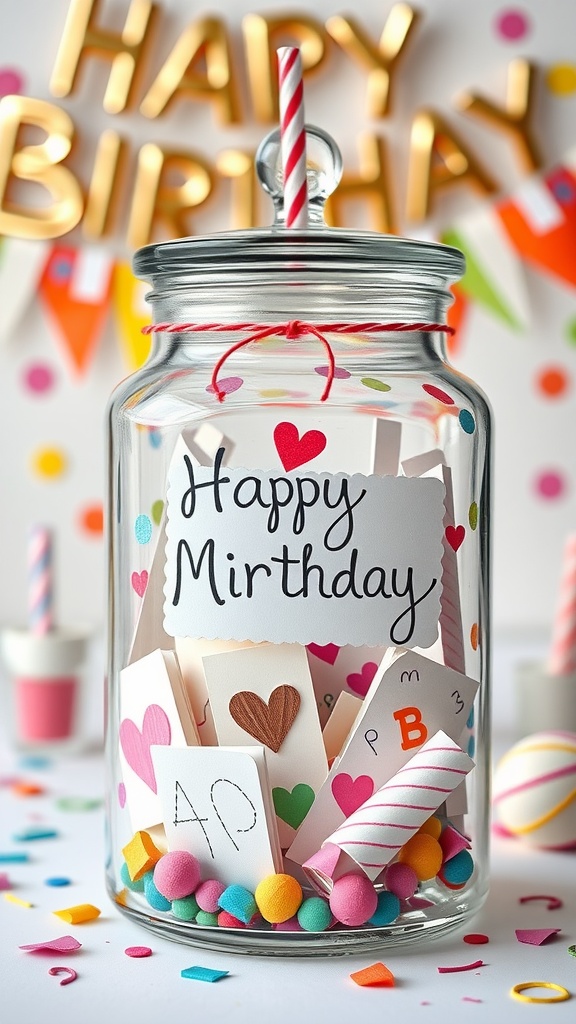
The Memory Jar Craft is a fun way to celebrate birthdays and create lasting memories. Just look at the image! The jar is filled with colorful notes and decorations, ready to capture all those special moments. It’s not just a craft; it’s a way to hold on to sweet memories.
To make this beautiful memory jar, you’ll need a few materials. Grab a clean glass jar, some colorful paper, scissors, markers, and little decorations like stickers or pom-poms. These items make it easy to personalize your jar, making it a perfect keepsake.
Now, let’s get started! First, take your paper and cut it into small strips. You can use any color you like. Then, ask your kids to write down their favorite memories or things they love about the birthday person. They can decorate the notes with drawings or stickers for extra fun.
Once you have plenty of memories written down, it’s time to fill up your jar! Layer the notes, add some pom-poms at the bottom, and top it off with decorations. You can even tie a cute ribbon around the jar for that extra touch.
This project is one of those easy activities for kids that you can enjoy together. It’s also a great way to reflect on good times.
4. Fun Photo Booth Props
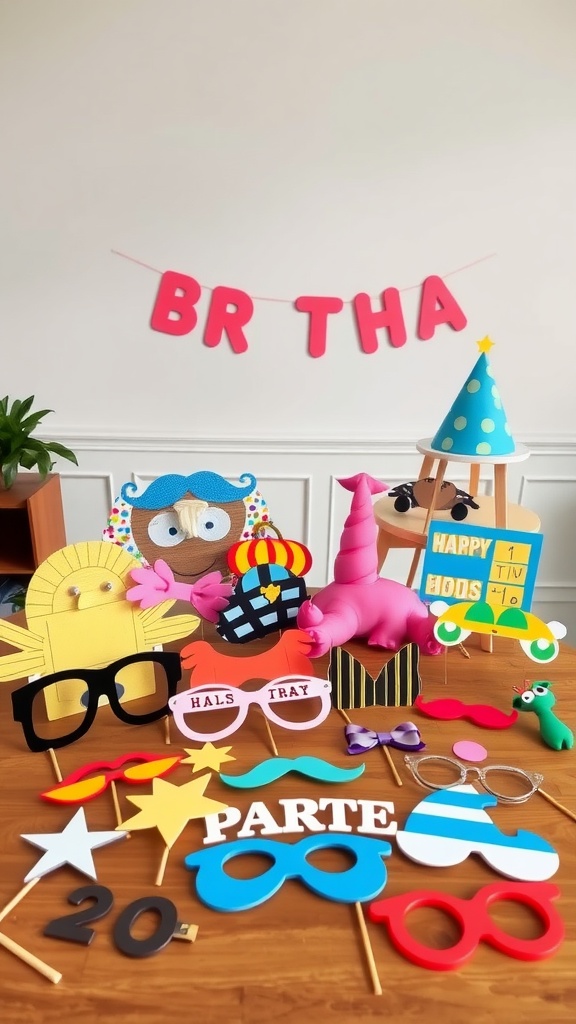
Creating a fun photo booth for birthday parties is one of my favorite ways to celebrate with my girls! Just look at all these colorful props! We have quirky glasses, funny mustaches, cute hats, and even a colorful party banner. Each prop adds a bit of silliness to the pictures, and it’s always a hit with the kids.
Making these props is super easy and perfect for little hands. Here’s what you’ll need:
- Colorful cardstock or foam sheets
- Scissors
- Hot glue gun (for adult use)
- Wooden skewers or straws
- Pens, markers, or stickers for decoration
Now, let’s get crafting!
Step 1:First, choose your shapes! You can create glasses, hats, or any funny faces you’d like. Draw the shapes on the cardstock and then cut them out. My girls love to help with this part, and it gets their creativity flowing.
Step 2:Next, use the hot glue gun to attach a wooden skewer or straw to the back of each prop. Make sure to let them cool down so the kids can safely hold them.
Step 3:Finally, decorate! My girls love adding stickers or drawing on the props with markers. The more colorful, the better!
Once everything is ready, set up a little photo area at your party. Use a simple backdrop and let the kids have fun taking silly pictures. It’s a great way to create memories!
5. DIY Birthday Party Hats
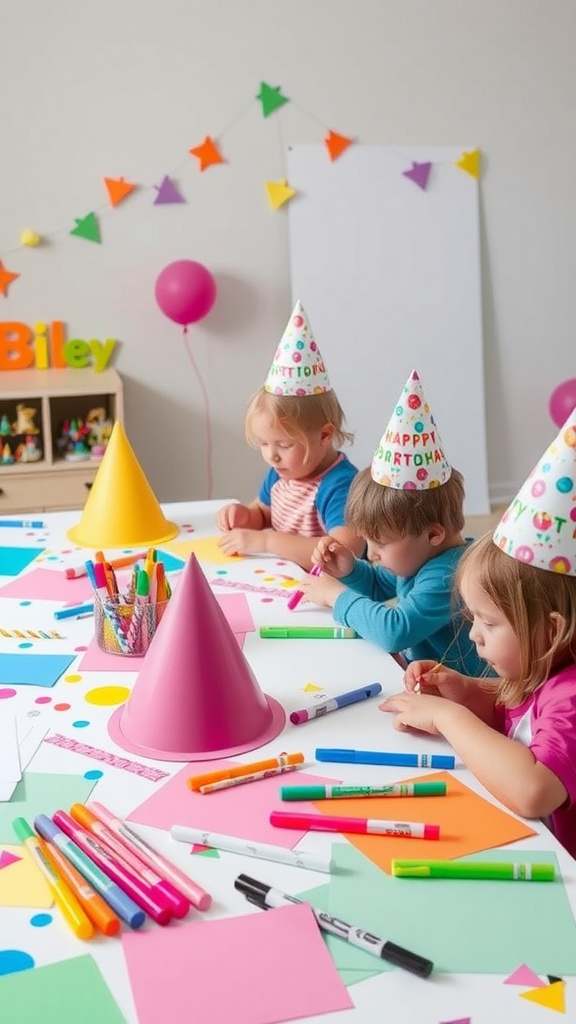
Making birthday party hats is one of the easiest and most fun activities for kids. The image shows children sitting around a table, working on their colorful party hats. They are using markers, papers, and other supplies to create their designs. This craft is perfect for kids and adds a personal touch to any birthday celebration!
To get started, you’ll need some basic materials. Gather colored paper, scissors, glue, markers, and any fun decorations like stickers or glitter. You can also use a few party hats as templates if you want to keep it simple.
Here’s how we do it at home:
- Cut the Paper:Start by cutting a large circle out of colored paper. The size depends on how big you want the hat to be.
- Shape the Hat:Cut a line from the edge of the circle to the center. Then overlap the edges to form a cone shape. Secure it with glue.
- Decorate:Now comes the fun part! Use markers and stickers to decorate the hat. My girls love adding sparkles!
- Make a Strap:Cut two strips of paper or use ribbon to create a chin strap. Attach them to the sides of the hat.
- Wear and Enjoy:Once everything is dry, try it on! Everyone will love their unique hats!
This simple craft is one of those easy activities for kids that keeps them engaged and excited. Plus, they can wear their creations during the party!
6. Colorful Balloon Garland

Nothing says celebration like a colorful balloon garland! It brightens up any space and makes your party feel extra special. I love creating this with my two girls for their birthdays. The bright colors really set the mood and make everything feel festive.
To make a balloon garland, you’ll need a bunch of balloons in different colors, balloon tape or fishing line, and a pump to inflate them. You might also want some scissors and string for hanging. The kids enjoy picking out their favorite colors!
Here’s how to do it:
First, blow up your balloons. You can choose any size you like, but a mix of small and big ones always looks great.
Next, take your balloon tape. It has holes where you can easily slide the balloons in. Start with the biggest balloons, and then fill in with smaller ones to create a full look.
Once they are all in place, hang the garland on a wall or around your party area. You can drape it over tables or doorways, too!
Finally, step back and admire your work! The best part is seeing the smiles on my kids’ faces when they see the colorful display.
7. Personalized Party Banners
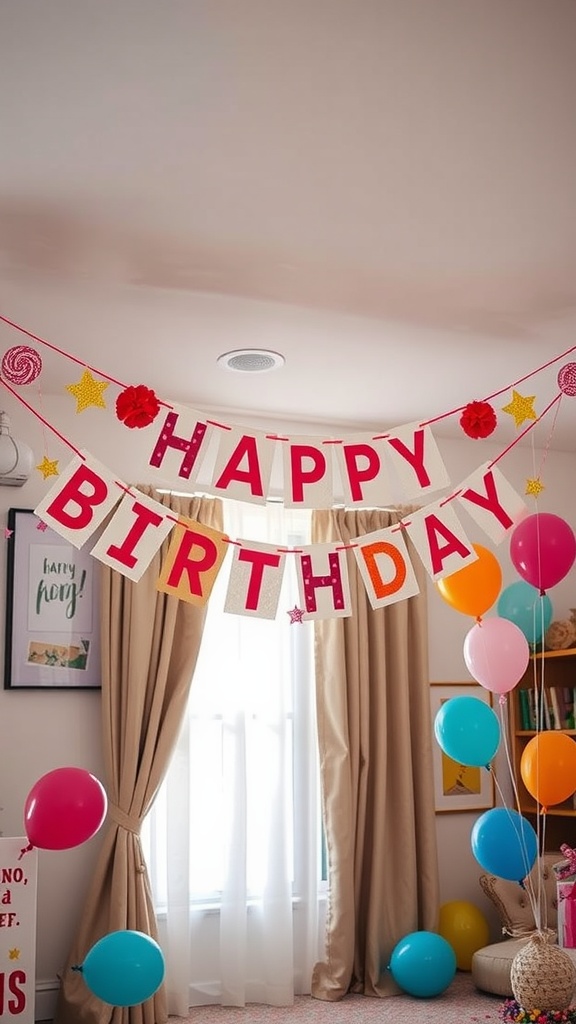
Banners are a fantastic way to add a personal touch to any birthday celebration! I love making these with my two daughters. They get so excited to see their hard work hung up for everyone to admire. Plus, it’s a great way to bring creativity into the party planning!
First, let’s gather our materials. You will need:
- Colored cardstock or paper
- Scissors
- String or twine
- Glue stick or tape
- Pencil
- Markers or stickers for decoration
Now, here’s how we make our personalized party banners:
- Start by cutting the cardstock into triangles or rectangles. Each piece will be a letter in your banner.
- Using a pencil, lightly write the letters of your chosen phrase (like “HAPPY BIRTHDAY”) on each piece.
- Next, let your kids decorate each letter with markers or stickers. They can make it as colorful and fun as they want!
- Once the decorations are dry, take your string and lay it out. Space the letters out evenly along the string.
- Finally, use glue or tape to attach each letter to the string. Hang it up and watch the smiles appear!
This is one of those easy activities for kids that can brighten up any party. Plus, it’s a fun way to work on fine motor skills while getting creative.
8. Crafty Gift Wrap and Tags

There’s something special about presenting a gift that’s beautifully wrapped. It adds to the excitement! For my girls’ birthday, we decided to get crafty with the gift wrap and tags. Using simple supplies, we made our presents look extra fun and personal.
Here’s what we used: brown kraft paper (you can find this at any craft store), colorful ribbons, markers, stickers, and some fun embellishments like buttons. You can turn ordinary materials into something extraordinary!
First, we started by wrapping the gifts in the kraft paper. I let my girls pick their favorite colors for the ribbon. After wrapping, we tied the ribbons around each package, making sure to create big, cheerful bows. This step was their favorite!
Next, we made our tags. We cut out simple rectangles from cardstock and used markers to write sweet messages like “Happy Birthday” and “You’re Awesome!” My girls loved adding stickers and drawing little doodles on the tags. We even glued some buttons for a fun touch!
Once the tags were ready, we attached them to the wrapped gifts with more ribbon. The final result was a colorful display that made every gift pop! Crafting gift wraps and tags together is one of those easy activities for kids that brings a lot of joy and creativity into our home.
9. Birthday Themed Friendship Bracelets
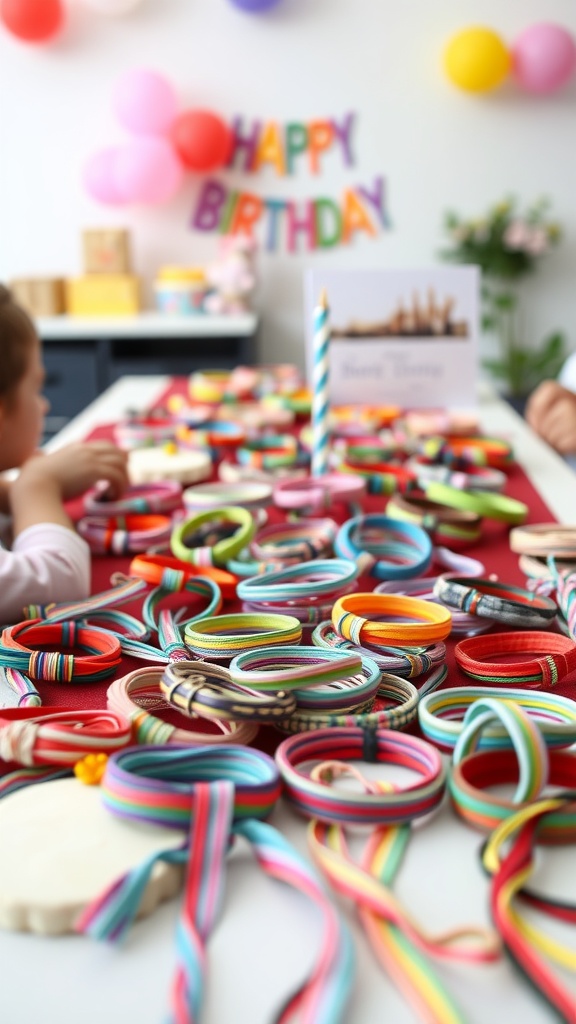
Making birthday-themed friendship bracelets is a fun way to celebrate with friends and family. My two girls love crafting, and these bracelets are a hit at birthday parties! They are colorful, easy to make, and it’s always a treat to wear something handmade.
To get started, here are the materials you’ll need:
- Colorful ribbons or embroidery floss
- Scissors
- Glue (optional)
- Beads (optional)
- Measuring tape
Now, let’s jump into the steps:
- Measure and cut your ribbons or floss. Aim for about 12-15 inches long for each piece. You can use different colors to create patterns.
- Gather three pieces of ribbon or floss together and tie a knot at one end, leaving some space for the bracelet to be put on later.
- Begin braiding the ribbons together. Start with the left piece over the middle, then the right piece over the new middle. Continue this until you reach the end.
- Once you have reached your desired length, tie another knot to secure it. You can also add beads before finishing if you want some extra flair!
- Trim any excess ribbon, and now your friendship bracelet is ready to wear or gift!
This craft is perfect for birthday parties and a great way to bond with friends. Plus, it can be one of those easy activities for kids that keeps them engaged and creative.
10. Decorative Table Centerpieces

Decorative table centerpieces can make a birthday party special. I love making fun and colorful decorations with my two girls. These centerpieces are always a hit and add a cheerful touch to the table.
We need some simple materials for this craft: colorful paper, empty jars, artificial flowers, scissors, and glue. You can find these supplies at home or a local craft store.
First, we decorate the jars. We cut colorful paper into strips and glue them around the jars. My girls pick their favorite colors, making it personal.
Next, we fill the jars with artificial flowers. We use bright ones that really pop. We arrange them in the jars and sometimes add glitter for extra sparkle.
Then, we put colored pencils in another jar. The kids can use them later for drawing or writing. It keeps them engaged and happy.
Finally, we sprinkle star-shaped confetti around the table. It adds a festive vibe that everyone loves. My girls always get excited to see the finished table.
Want more fun crafts for kids? After making pipe cleaner flowers, try making beautiful blooms from old egg cartons. Check out the tutorial here. Or, if you haven’t made the pipe cleaner flowers yet, start with this simple project!