
As a mom of two little ones, I know how much kids love getting their hands messy with clay! It’s not just fun; it’s a fantastic way for them to express their creativity and improve their fine motor skills. In this list, I’ve put together 20 playful and simple clay projects that are perfect for little hands. Let’s get those imaginations rolling!
Miniature Clay Food
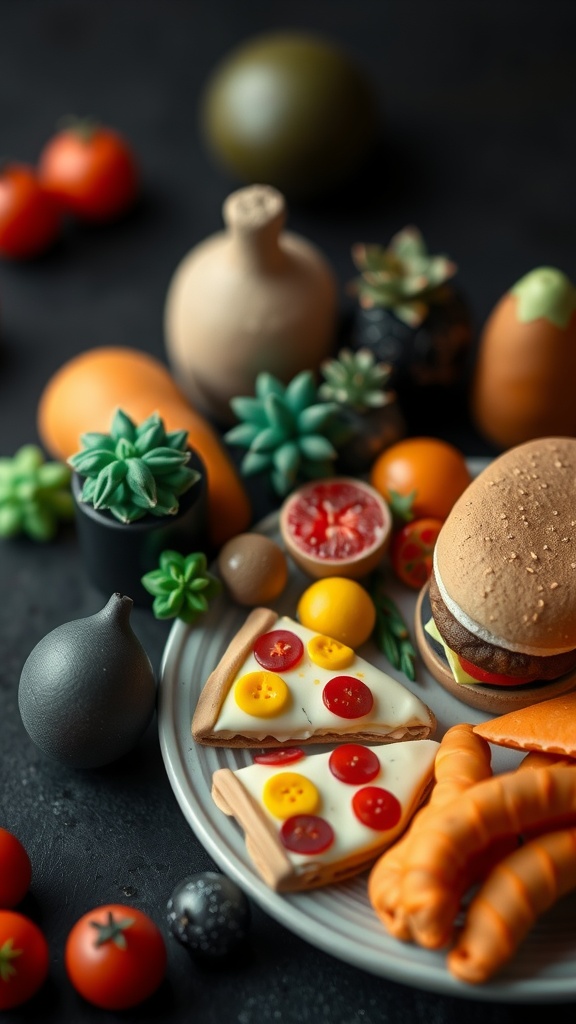
Making miniature clay food is a fantastic way for kids to express their creativity while having fun! These tiny treats not only look adorable, but they also allow little ones to learn about different foods in a playful manner. The best part? It’s incredibly easy to make, making it a perfect craft for young children to enjoy with a caring adult.
With just a few simple steps, kids can transform colorful clay into their favorite snacks and meals. From pizzas to burgers, the possibilities are endless, and the smiles that come from creating these tiny masterpieces are priceless. Plus, it’s a great way to spend quality time together!
Creative Clay Pots
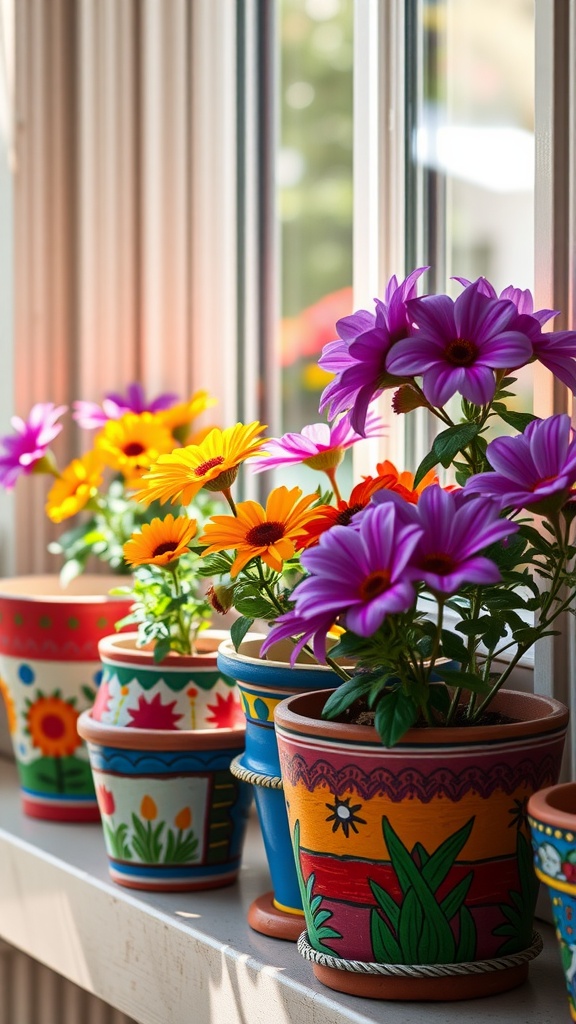
Making creative clay pots is such a fun project for kids! These colorful pots are perfect for holding small plants or as decorative pieces for their room. The best part is that they’re super easy to make, allowing your little ones to express their artistic side while learning about crafting.
Transforming simple clay into beautiful pots can be a delightful experience. The clay art is not only rewarding but also provides a sense of accomplishment when they see their finished product. Plus, they can personalize each pot with paint and designs, making them truly unique!
Ingredients
- 2 cups air-dry clay
- 1 cup acrylic paint (various colors)
- Paintbrushes
- Water for smoothing
- Sealer (optional)
Instructions
- Form the Pot: Take a portion of air-dry clay and shape it into a small pot, smoothing the edges with water. Make sure it has a hole at the bottom for drainage.
- Dry the Pot: Let the pot dry completely, which usually takes about 24 hours.
- Paint: Once dry, use acrylic paint to decorate the pot. Your kids can create patterns, images, or even write their names!
- Seal (optional): If desired, apply a sealer to protect the paint. This step is great if the pots will be used outdoors.
Fun Clay Monsters
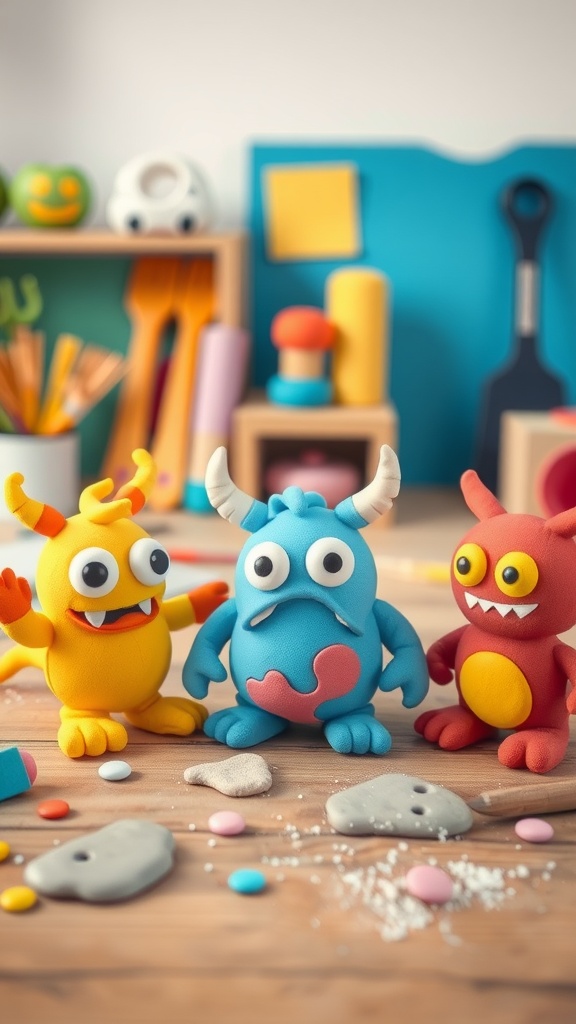
Creating fun clay monsters is a fantastic way to unleash creativity in kids while keeping them entertained. These charming little creatures can come in all shapes, sizes, and colors, making them perfect for young hands. The best part? They’re simple to make, allowing your little ones to express their imagination freely.
With just a few basic ingredients, kids can mold their own unique monsters. This activity not only boosts their artistic skills but also enhances their fine motor skills. Plus, it’s a great bonding time for us as parents, watching their faces light up as their ideas come to life!
Ingredients
- 2 cups flour
- 1 cup salt
- 2 cups water
- 2 tablespoons vegetable oil
- 1 tablespoon cream of tartar
Instructions
- Mix the Ingredients: In a large pot, combine flour, salt, water, vegetable oil, and cream of tartar. Stir until well blended.
- Cook the Mixture: Place the pot on medium heat and continuously stir until the mixture thickens and forms a dough-like consistency.
- Knead the Dough: Remove from heat and let it cool slightly. Once it’s safe to touch, knead the dough until it’s smooth.
- Shape the Monsters: Let your kids take over! They can create their monsters using various colors and shapes. Use cookie cutters, rolling pins, and even their hands!
- Dry the Clay: Allow the creations to air dry for a day or two until they harden completely.
Personalized Clay Jewelry
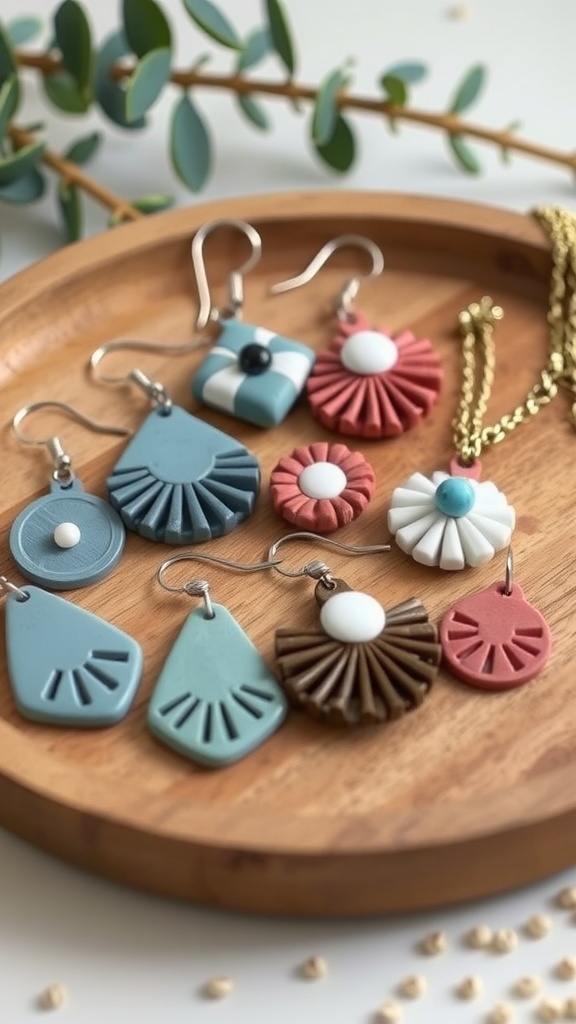
Creating personalized clay jewelry is such a delightful project that kids can easily get into. With just a few simple materials, you can make unique pieces that are perfect for gifts or keeping as special keepsakes. The best part? Each piece reflects your child’s creativity, making them one-of-a-kind treasures!
This project is not only fun but also a wonderful way to explore clay art and express individuality. With some colorful polymer clay and basic tools, young hands can roll, mold, and shape their own jewelry. It’s a great bonding activity, and seeing their faces light up when they wear their creations is priceless. Now, let’s get into how you can make your very own clay earrings and necklaces!
Ingredients
- Polymer clay in various colors
- Clay tools (rolling pin, cutters, and molds)
- Jewelry findings (earring hooks, necklace chains)
- Oven (for baking the clay)
- Glitter or small embellishments (optional)
Instructions
- Prepare the Clay: Start by preheating the oven according to the clay package instructions. Take small pieces of colored polymer clay and knead them until soft and pliable.
- Shape Your Jewelry: Use the rolling pin to flatten the clay. Then, cut out shapes using cookie cutters or molds. Add designs and details with tools or your fingers.
- Add Findings: If making earrings, make small holes at the top of each piece for the earring hooks. For necklaces, you can create a loop to thread the chain through.
- Bake the Clay: Place the shaped pieces on a baking sheet lined with parchment paper. Bake in the preheated oven for the recommended time, usually around 15-30 minutes, depending on the thickness.
- Let Cool and Assemble: After baking, let the jewelry cool completely. Once cooled, attach the earring hooks or necklace chains, and your personalized clay jewelry is ready to wear!
Colorful Clay Animals
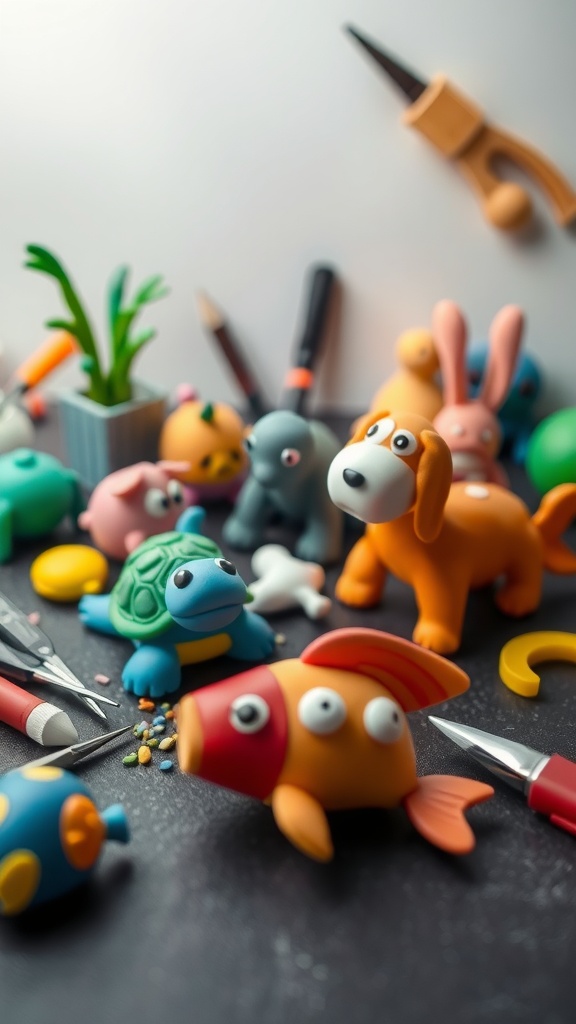
Making colorful clay animals is such a fun and creative activity for my kids. It’s amazing to see how a simple piece of clay can turn into a vibrant turtle, a bright fish, or even a playful puppy. The textures and colors are delightful, and the best part is that it’s super easy to do!
This craft is perfect for little hands and big imaginations. My kids love shaping the clay and choosing their favorite colors. Plus, it’s a wonderful way to bond and spend time together, all while creating something unique. If you’re looking for a fun project to try at home, these colorful clay animals are a fantastic option!
Here’s a simple recipe for homemade clay that you and your kids can use to create your own colorful clay animals:
Whimsical Clay Figurines
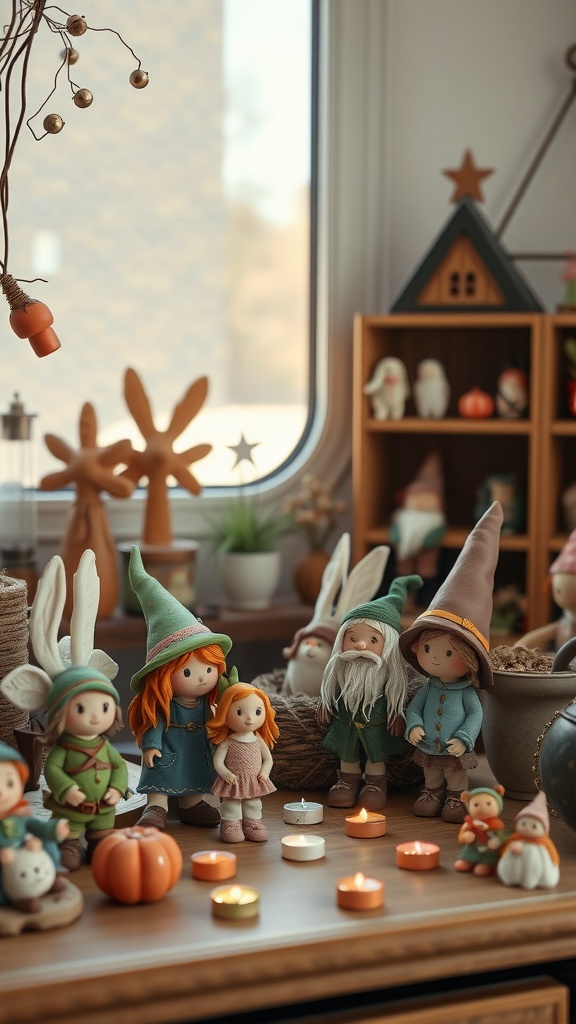
Making whimsical clay figurines is such a delightful activity for kids! These charming little creations can be anything from tiny fairies to funny animals, and they add a touch of personality to any space. Plus, the soft texture of clay is super fun for little hands to mold and shape. It’s a simple and joyful craft that sparks creativity, making it perfect for a rainy day at home.
As a loving mom of two, I always look for crafts that are easy and enjoyable. This clay art project is just that! Not only do the kids get to play with their imagination, but they also end up with unique decorations they can proudly display. Let’s get started on this fun clay adventure!
Ingredients
- 2 cups all-purpose flour
- 1 cup salt
- 1 cup water
- 1 tablespoon vegetable oil
- Food coloring (optional)
Instructions
- Mix the Dry Ingredients: In a large bowl, combine flour and salt. Stir until well mixed.
- Add Wet Ingredients: Gradually add water and vegetable oil to the dry mix, stirring until a dough forms.
- Knead the Dough: On a floured surface, knead the dough for about 5 minutes until it’s smooth and pliable.
- Color the Dough: If you want to add color, divide the dough and knead in a few drops of food coloring until evenly colored.
- Shape Your Figurines: Let your kids roll, pinch, and mold the clay into fun shapes—let their imaginations run wild!
- Dry the Figurines: Place the finished creations on a baking sheet and let them air dry for 24-48 hours, or bake them at a low temperature for about 30 minutes.
Interactive Clay Maps
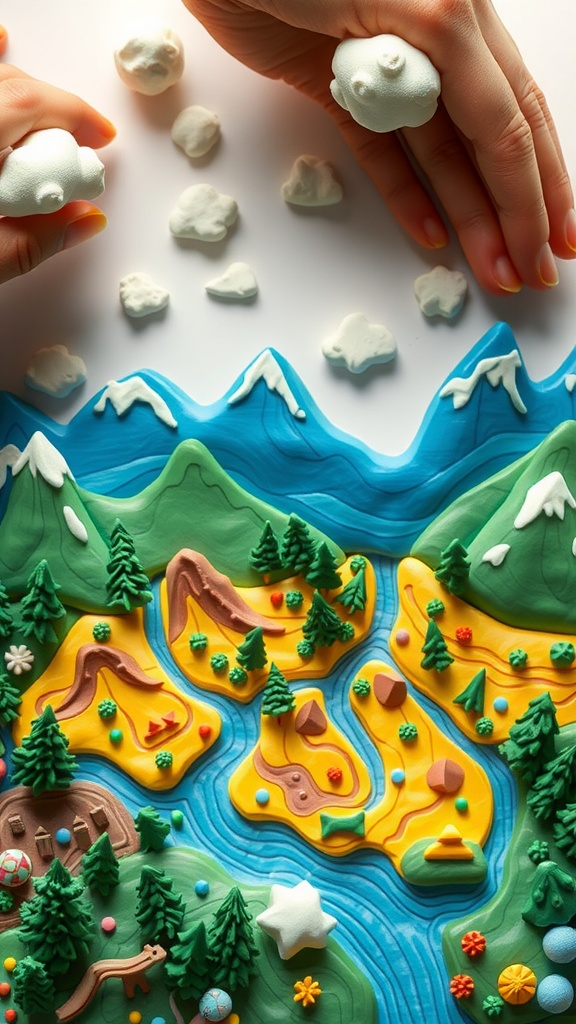
Creating interactive clay maps is such a delightful activity for kids! It combines fun and learning, allowing them to explore geography in a hands-on way. My little ones love molding colorful clay into various landscapes, like mountains, rivers, and forests. Not only does it spark their creativity, but it also helps them understand the world around them.
The process is simple and can be done with just a few basic materials. Kids can use their favorite colors to represent different terrains and add fun details like trees or animals. It’s an engaging art project that keeps them entertained for hours!
Ingredients
- Assorted colors of air-dry clay
- Clay tools (like rolling pins and cutters)
- Paint (optional for decoration)
- Pens or markers for labeling
Instructions
- Start by rolling out different colors of clay into flat sheets.
- Shape the clay into various landforms – create mountains, rivers, valleys, and lakes using your hands or tools.
- Assemble the pieces on a large flat surface to form a map.
- Add small details like trees, flowers, or animals using different clay colors.
- If desired, let the map dry and then use paint or markers to add labels or extra decorations.
Clay Holiday Ornaments

Making clay holiday ornaments is a fantastic way to get the kids involved in festive decorations. These ornaments are not only fun to create but also add a personal touch to our holiday celebrations. They’ll remind us of the joy we had making them together every time we hang them on the tree!
This recipe is simple enough for young kids to participate, allowing them to express their creativity. With just a few ingredients, we can make beautiful ornaments that are perfect for gifting or decorating. The dough is easy to work with, making it a delightful project for a cozy day at home.
Ingredients
- 2 cups all-purpose flour
- 1 cup salt
- 1 cup water
- 1 tablespoon vegetable oil
- 1 teaspoon cinnamon (optional for a lovely scent)
- Food coloring or paint (optional for decoration)
Instructions
- Prepare the Dough: In a large bowl, combine the flour, salt, and cinnamon (if using). Gradually add the water and oil, mixing until a soft dough forms.
- Knead the Dough: Knead the dough on a floured surface for about 5 minutes until it’s smooth. If it’s too sticky, sprinkle in a little more flour.
- Shape the Ornaments: Roll out the dough to about 1/4 inch thickness. Use cookie cutters to cut out fun shapes like stars, snowflakes, or hearts. Make a small hole at the top of each shape for stringing later.
- Dry the Ornaments: Place the cut-out shapes on a baking sheet lined with parchment paper. Let them air dry for 24-48 hours or bake them at 200°F (93°C) for 2-3 hours until completely hardened.
- Decorate: Once dry, the kids can paint or decorate the ornaments with markers or glitter, making them unique!
- Finish: Thread some string through the holes and hang your beautiful creations on the tree or around the house.
Creative Clay Masks
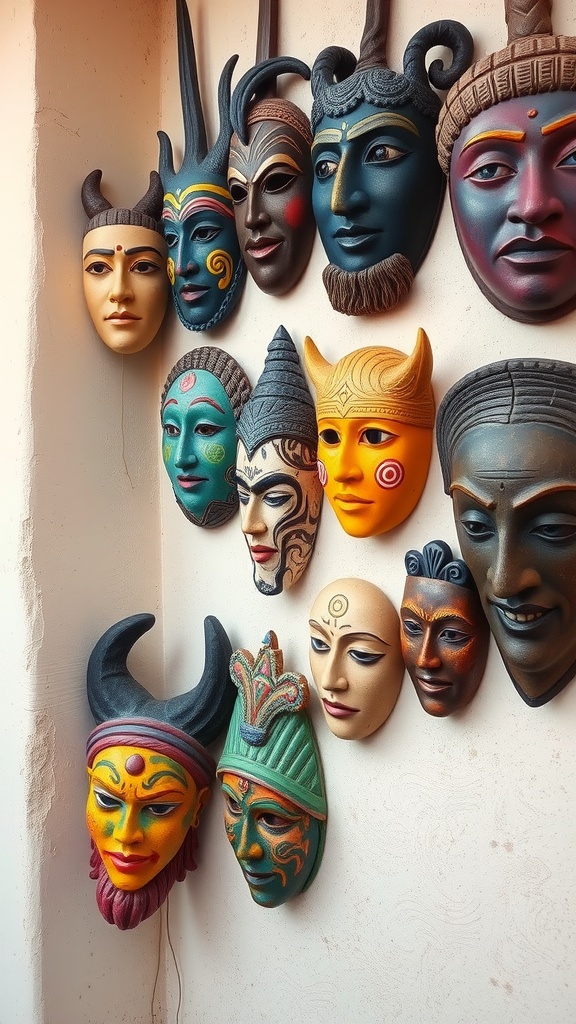
Making clay masks can be a fun and exciting project for kids! It’s a simple way for them to express their creativity while developing their fine motor skills. You can create masks that represent different characters or simply let their imagination lead the way. The best part? They get to paint and decorate their masks, adding their own personal touch!
This project is perfect for young kids, ensuring they have a blast while working with their hands. Plus, it’s a great activity to do together, fostering bonding time while getting crafty. Let’s gather our materials and jump into this colorful world of clay art!
Ingredients
- 1 cup air-dry clay
- Water (as needed for consistency)
- Colorful paints (acrylic or washable)
- Paintbrushes
- Decorative items (like glitter, feathers, or beads)
Instructions
- Shape the Mask: Start by taking a handful of air-dry clay and molding it into the shape of a face. You can create a flat mask or one that has depth for a 3D effect.
- Add Features: Use tools or your fingers to sculpt eyes, a nose, and a mouth. Let your kids be creative with the features!
- Dry the Mask: Allow the mask to dry completely according to the clay package instructions, usually about 24 hours.
- Paint: Once dry, it’s time to paint! Let the kids choose their favorite colors and designs.
- Decorate: After the paint has dried, add some fun decorations like glitter or feathers to make each mask unique!
Clay Bead Bracelets
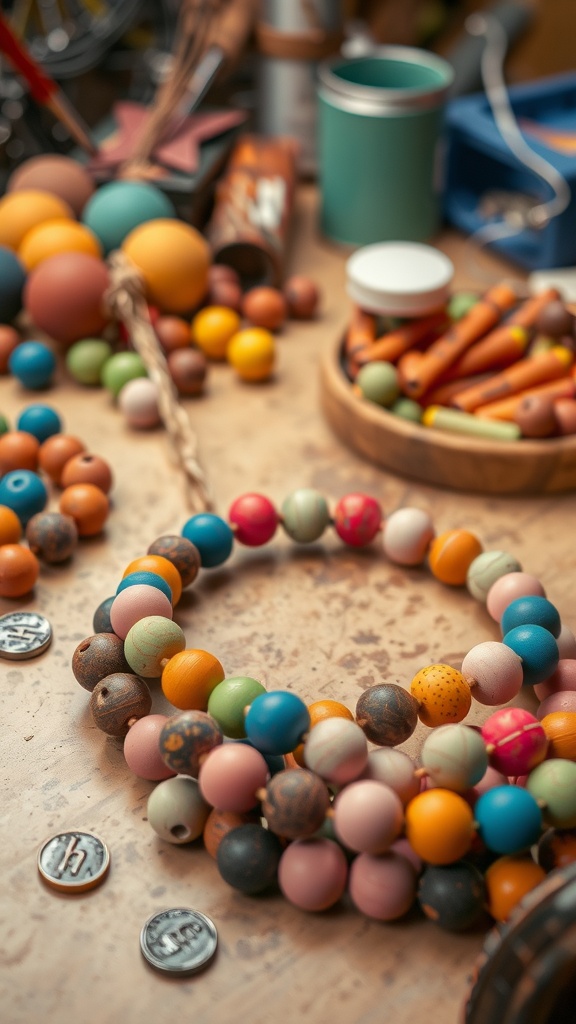
Making clay bead bracelets is a fun and creative activity that allows kids to explore their artistic side while enhancing their fine motor skills. The vibrant colors and textures of the clay make each bead unique, creating a one-of-a-kind accessory that kids will love to wear or gift. This project is simple enough for young children and requires minimal materials, making it an ideal choice for a rainy day or a weekend craft session.
To get started, all you need is some air-dry clay, paint, and elastic string. Kids can mold the clay into beads of various shapes and sizes, then paint them in their favorite colors. Once dry, string them together to create beautiful bracelets. This not only sparks creativity but also provides a sense of accomplishment as they wear their handmade jewelry.
Ingredients
- Air-dry clay (any color)
- Paint (acrylic or non-toxic)
- Elastic string
- Paintbrush
- Bead rolling tool (optional)
Instructions
- Prepare the Clay: Take a small piece of air-dry clay and roll it into a ball. You can make different sizes for variety.
- Shape the Beads: Use your fingers or a bead rolling tool to form the clay into your desired shape. Make sure to poke a hole through the center of each bead for stringing later.
- Dry the Beads: Lay the beads on a clean surface and let them dry completely, following the clay package instructions.
- Paint the Beads: Once dry, use paint and a brush to decorate the beads. Let the paint dry before moving on.
- String the Beads: Cut a piece of elastic string to your desired bracelet length. Thread the painted beads onto the elastic, tying a knot once you’re finished to secure them in place.
Unique Clay Keychains
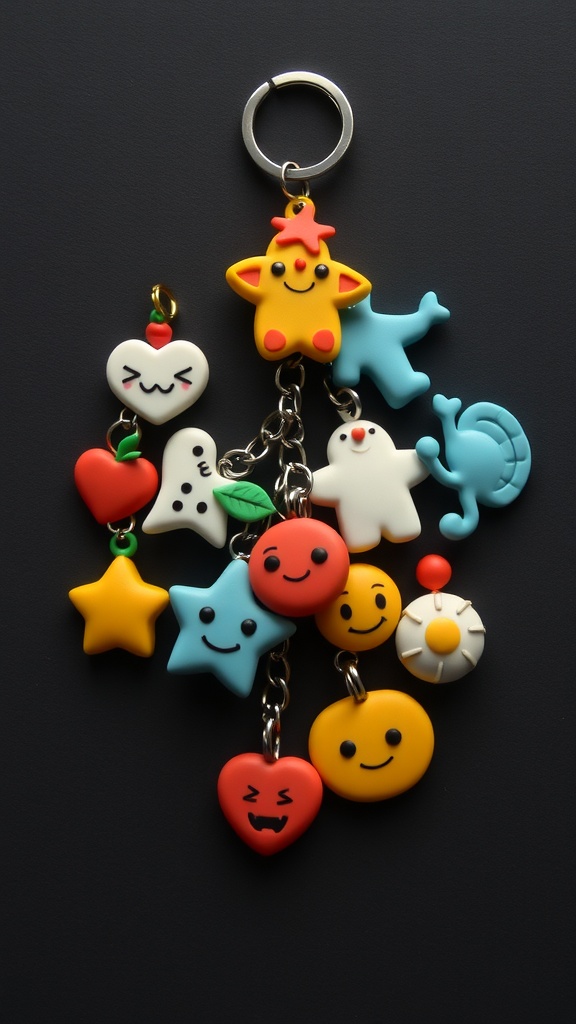
Making unique clay keychains is a delightful project that my kids and I love to do together. These colorful little charms are not just fun to create; they also add a personal touch to our bags and keys. The best part? They are really simple to make, so even younger kids can join in on the fun! Plus, they can choose their favorite shapes, colors, and designs, giving them the freedom to express their creativity.
This craft is a fantastic way to spend quality time with your little ones while encouraging their artistic side. With just a few materials and some imagination, you can create adorable keychains that are perfect for gifts, party favors, or just a fun addition to your family’s collection. Here’s how you can make your own unique clay keychains!
Ingredients
- Colored polymer clay (various colors)
- Keychain rings
- Small tools for shaping (like a toothpick or a plastic knife)
- Oven for baking the clay
- Varnish (optional, for a glossy finish)
Instructions
- Preheat your oven to the temperature specified on your polymer clay package.
- Start with a small piece of clay and roll it into a ball. Shape it into your desired design, like a star, heart, or smiley face.
- Use your tools to add details, such as eyes or patterns, to your keychain. This is where your kids can really get creative!
- Make a small hole at the top of your design with a toothpick so you can attach the keychain ring later.
- Place your creations on a baking sheet lined with parchment paper. Bake them according to the instructions on the clay package.
- Once baked and cooled, you can add varnish for a shiny finish if you like. Finally, attach the keychain rings and they’re ready to use!
Custom Clay Picture Frames
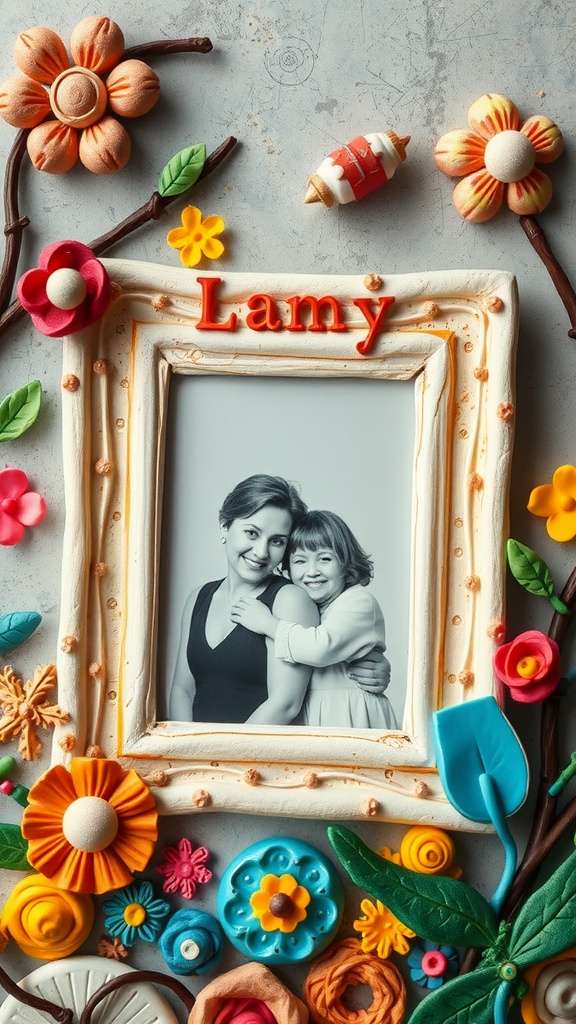
Making custom clay picture frames with your kids is such a fun and creative way to capture memories. These frames can be decorated in any style your little ones imagine, making each piece unique. It’s a simple project that can keep kids engaged and excited as they express their artistic side.
Plus, this craft is a wonderful opportunity to bond as a family. I love watching my kids bring their ideas to life, and we often end up with beautiful frames that showcase our favorite photos. Here’s how to make your own custom clay picture frames!
Ingredients
- 2 cups air-dry clay
- 1/2 cup acrylic paint (any color you like)
- Craft tools (like rolling pins and cookie cutters)
- Glue (for attaching decorations)
- Decorative items (like beads, buttons, or dried flowers)
Instructions
- Prepare the Clay: Start by kneading the air-dry clay until it’s smooth. This makes it easier for little hands to work with.
- Shape the Frame: Roll out the clay to about 1/4-inch thickness. Use a rectangular cutter to create the frame’s base. Cut out a smaller rectangle in the center for the photo.
- Decorate: Let your kids have fun decorating the frame! They can use cookie cutters to make shapes, or even mold their own designs.
- Dry: Allow the frame to air dry completely as per the manufacturer’s instructions. This usually takes about 24 hours.
- Paint: Once dry, paint the frame in your chosen colors. Let the kids get creative with patterns and designs!
- Finish Up: Once the paint is dry, glue on any additional decorations you like. Finally, insert a cherished photo and find the perfect spot to display your masterpiece!
Playful Clay Dinosaurs
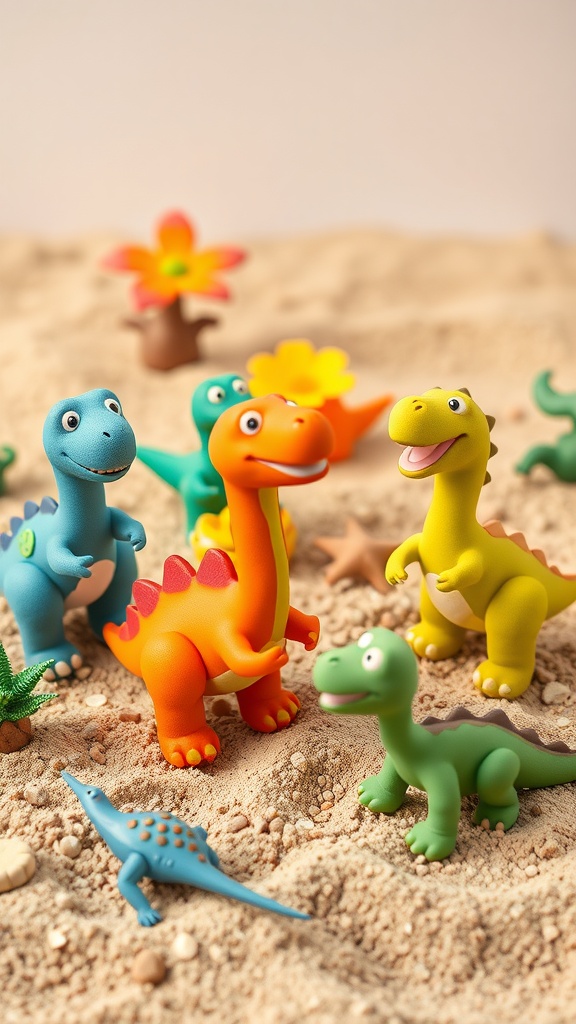
Creating playful clay dinosaurs is a fantastic way to engage kids in a fun and artistic activity. The best part? These colorful little creatures are simple to make and can spark countless imaginative play scenarios. It’s a perfect project for young kids, allowing them to express their creativity while developing fine motor skills.
With just a few basic supplies, you can have a mini dinosaur world right at your fingertips. Kids will love shaping the clay into different dinosaur forms, and you’ll have the chance to bond over this delightful craft. Plus, once they’re done, they can enjoy their creations as toys! Here’s a fun recipe for making your very own clay:
Ingredients
- 2 cups all-purpose flour
- 1 cup salt
- 2 cups water
- 2 tablespoons vegetable oil
- 2 tablespoons cream of tartar
- Food coloring (optional)
Instructions
- Mix the Ingredients: In a large pot, combine the flour, salt, cream of tartar, and vegetable oil. Gradually stir in the water. If you want colored clay, add a few drops of food coloring at this stage.
- Cook the Mixture: Place the pot over medium heat and stir continuously until the mixture thickens and forms a ball. This should take about 3-5 minutes.
- Cool Down: Remove the pot from the heat and let the dough cool for a few minutes before kneading it by hand to make it smooth.
- Shape Your Dinosaurs: Divide the dough into smaller portions and let your kids mold their favorite dinosaurs. Encourage them to add details like eyes or spikes!
- Store the Clay: If you have any leftover clay, store it in an airtight container to keep it fresh for future play.
Colorful Clay Flowers
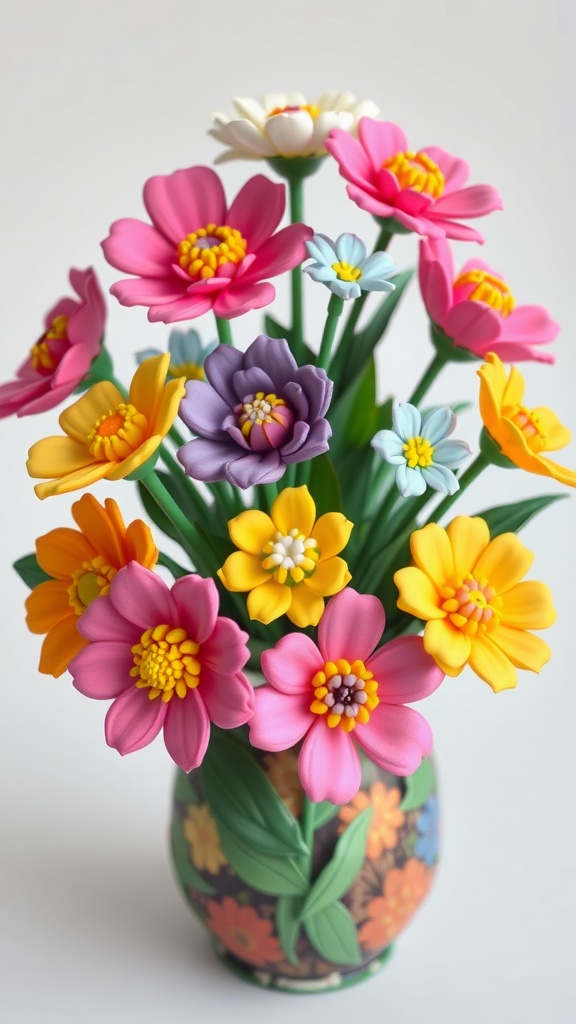
Making colorful clay flowers is a delightful activity that brings out creativity in kids and provides a great way to bond as a family. These flowers are not only visually appealing but also serve as wonderful decorations for any room. The best part? They’re simple enough for young kids to create with a little guidance from mom!
To start, gather your favorite clay colors and let the fun begin! Kids can mix and match colors, shaping petals and leaves as they go. It’s a fantastic way for them to express themselves while developing fine motor skills. Plus, these clay flowers make for lovely gifts or keepsakes. Let’s get crafting!
Crafty Clay Stamps
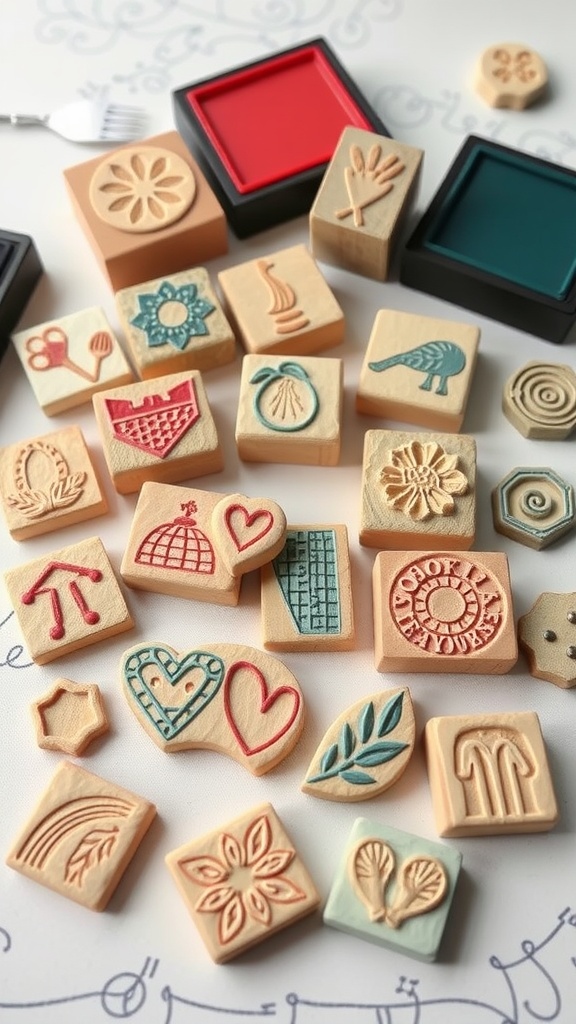
Making clay stamps with my little ones is always a fun time! The process is simple and allows for so much creativity. Kids can use their favorite shapes, letters, or even their own designs to create unique stamps that can be used for various art projects. The best part is that they get to play with clay while developing fine motor skills and artistic expression.
With just a few materials, this project can keep your kids entertained for hours. Plus, using these stamps on paper or fabric can add a personal touch to their crafts. It’s a wonderful way for them to see the tangible results of their creativity. Let’s dive into the simple steps to make your own crafty clay stamps!
Ingredients
- Air-dry clay (white or colored)
- Cookie cutters or carving tools
- A rolling pin
- Paint (optional)
- Acrylic block or wood for the stamp base
- Ink pad (for stamping)
Instructions
- Prepare the Clay: Start by kneading the air-dry clay until it becomes soft and pliable. Roll it out to about 1/4 inch thickness using a rolling pin.
- Cut Out Shapes: Use cookie cutters or carving tools to cut out shapes from the rolled-out clay. Encourage your kids to create their own designs as well!
- Make the Stamp Base: If using a wood block, press the clay shapes onto the base firmly. If not, just set the shapes aside to dry.
- Dry the Stamps: Allow the stamps to air-dry according to the package instructions. This usually takes 24 hours.
- Get Crafty: Once dry, use an ink pad to stamp on paper, cards, or fabric. Let your children experiment with different colors and patterns!
Clay Wind Chimes
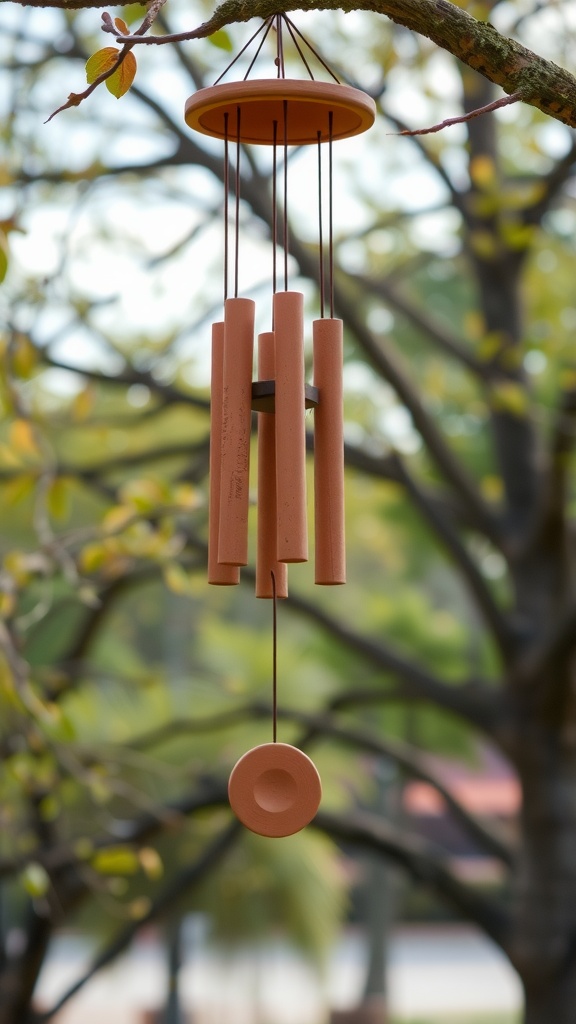
Making clay wind chimes is a delightful activity that brings creativity and fun into our home. These charming decorations not only add beauty to our outdoor spaces but also produce soothing sounds when the wind blows. It’s a simple project that my kids absolutely love, and it’s perfect for young hands eager to explore clay art.
With just a few materials and steps, we can create our own wind chimes that reflect our personalities. Plus, it’s a great way to spend quality time together while crafting something special for our garden or balcony. Here’s how we make them!
Ingredients
- Air-dry clay or polymer clay
- Paint (acrylic or spray) for decorating
- String or twine
- Wooden dowels or skewers
- Round base (like a wooden circle or thick cardboard)
- Drill or sharp object for making holes
- Paintbrushes
- Sealant (optional, for outdoor use)
Instructions
- Shape the Clay: Start by rolling out the clay to your desired thickness. Cut out various shapes like circles, stars, or any fun designs. Remember to poke a hole at the top of each piece for hanging later!
- Dry and Decorate: Let the clay pieces dry completely. Once dry, my kids love painting them with bright colors. We make sure to let each layer dry before applying another coat.
- Prepare the Base: Take your round base and make holes around the edge where the strings will go. We usually do four to six holes depending on the number of clay pieces we made.
- Assemble the Wind Chime: Cut lengths of string or twine and tie each piece of clay to the strings. Then, tie the other ends to the holes in the base. Adjust the lengths so that they hang at different heights for a playful look.
- Finish Up: If you want your wind chimes to last outdoors, a layer of sealant will protect them from the weather. Finally, find a lovely spot to hang your creation and enjoy the soothing sounds it brings!
Whimsical Clay Vehicles
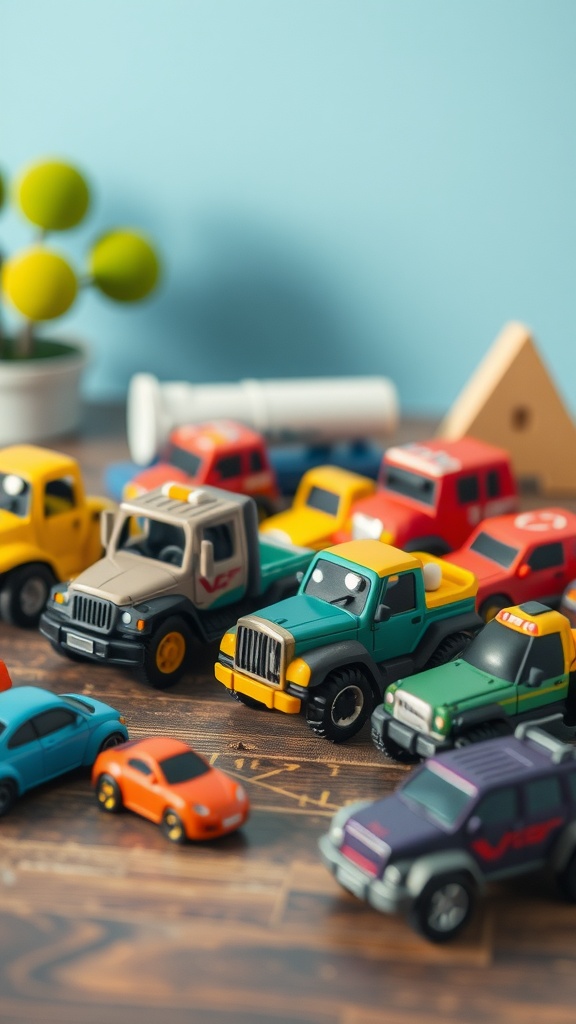
Making whimsical clay vehicles is a wonderfully fun and imaginative activity for kids. With just a few simple materials, your little ones can create their own cars, trucks, and more. This hands-on craft not only sparks creativity but also enhances fine motor skills as they mold and shape their designs.
As a mom of two, I love how easy it is to gather supplies for this project. You just need some clay, basic tools, and a sprinkle of imagination. My kids always get excited to see what unique vehicles they can come up with!
Ingredients
- 1 package air-dry clay (any color)
- 1 set of child-safe sculpting tools
- Optional: acrylic paints for decoration
- Clear sealant (if desired)
Instructions
- Start by taking a chunk of air-dry clay and knead it until soft.
- Shape the clay into the desired vehicle form—think cars, buses, or even rocket ships!
- Use sculpting tools to add details like wheels, windows, and headlights.
- Let the creations dry according to the package instructions (usually 24 hours).
- If using, paint your vehicles with acrylic paint and let them dry again. Finish with a clear sealant for added protection.
Interactive Clay Storyboards
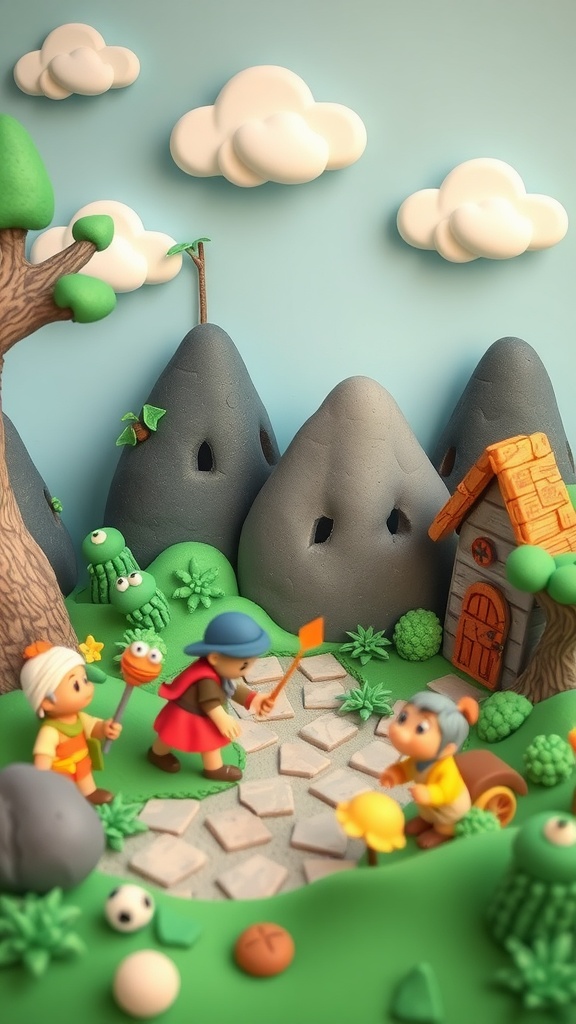
Creating interactive clay storyboards is a delightful way for kids to express their creativity and storytelling skills. This fun activity allows children to craft their own scenes using colorful clay, turning their imaginative ideas into vibrant 3D art. The best part? It’s simple to make and requires just a few supplies!
Kids can shape characters, build landscapes, and even add tiny details like trees and buildings. It’s a great hands-on project that sparks their imagination while also helping develop fine motor skills. Plus, once they’re finished, they can use their storyboards for playful storytelling!
Ingredients
- Various colors of clay (air-dry or oven-bake)
- Plastic tools for shaping and cutting
- Cardboard base or canvas
- Small accessories (like googly eyes, beads, or stickers)
- Water (for smoothing out clay)
- Rolling pin (optional)
Instructions
- Gather Materials: Set up a crafting space with all your clay colors and tools. If you have a cardboard base or canvas, that will be your storyboard background.
- Shape Your Characters: Let your kids mold their favorite characters or creatures. They can use different colors for clothing or features.
- Create the Scene: Build the environment around the characters. Roll out clay to make trees, mountains, and any other elements they want to include.
- Assemble the Storyboard: Arrange the characters and scenery on the cardboard base. Use water to smooth out any rough edges if needed.
- Let It Dry: If you’re using air-dry clay, allow it to dry completely, or follow the baking instructions for oven-bake clay. Once set, they can play with their storyboards!
Festive Clay Decorations

Creating festive clay decorations is a wonderful activity for kids, perfect for brightening up any space. These playful designs can be tailored for various occasions, be it a birthday party, holiday celebration, or simply a fun craft day. The best part? They’re easy and super fun to make, allowing little hands to get creative with colors and shapes.
With just a few simple materials, your little ones can mold and shape their own decorations. Whether it’s mini cakes, colorful balloons, or cheerful flowers, the possibilities are endless. Plus, these crafts not only foster creativity but also give kids a wonderful sense of accomplishment when they see their finished pieces.
Ingredients
- 2 cups all-purpose flour
- 1 cup salt
- 2 tablespoons vegetable oil
- 1 cup water
- Food coloring (optional)
- Cookie cutters or molds
- Paint (for decorating)
- Sealer (optional, for a glossy finish)
Instructions
- Mix the Dough: In a large bowl, combine flour, salt, and vegetable oil. Gradually add water, mixing until a soft dough forms. If you want to add colors, divide the dough and knead in food coloring.
- Shape Your Decorations: Roll out the dough on a clean surface. Use cookie cutters or your hands to create fun shapes like cakes, balloons, or stars.
- Drying Time: Place the shaped decorations on a baking tray. Let them air dry for about 24 hours, or bake them at a low temperature (200°F) for 1-2 hours until they harden.
- Decorate: Once dry, your kids can paint and decorate their creations as they wish. Use various colors and even add glitter for some sparkle!
- Seal (optional): If you want a glossy finish, apply a sealer once the paint is dry.
Clay-Sculpted Animals for Puppetry
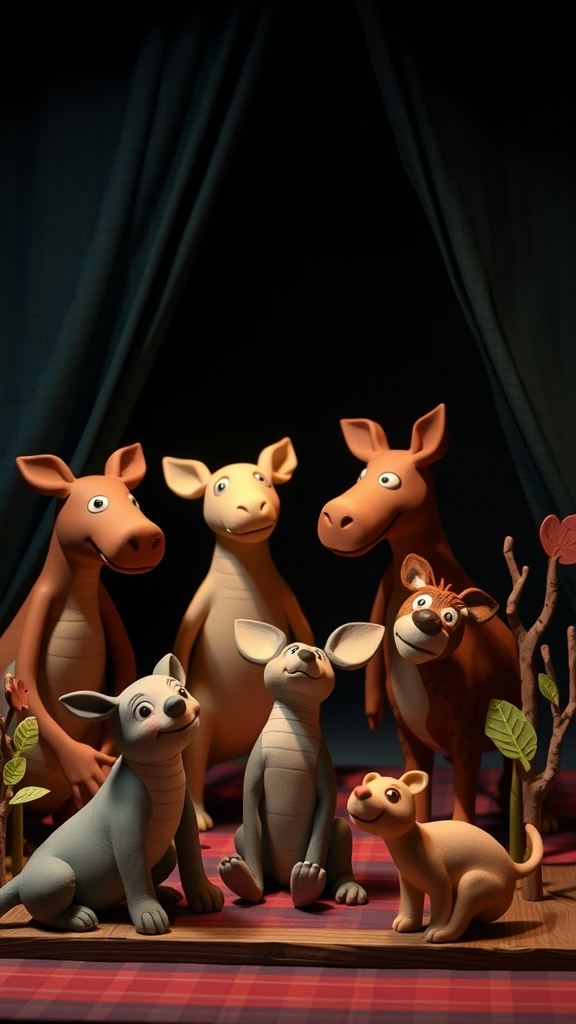
Creating clay-sculpted animals is a fantastic activity for kids! It’s simple, fun, and sparks their imagination. You can make various creatures, from playful puppies to majestic lions, all using basic clay art techniques. This project not only enhances their creativity but also provides a great opportunity for storytelling and puppetry, turning each sculpted animal into a character with a personality.
My kids and I love gathering around the kitchen table, rolling, shaping, and painting our clay creations. It’s a wonderful way to bond while also exploring arts and crafts together. Plus, the best part is that these little sculptures can become puppets for an even more interactive playtime! Here’s a quick and easy recipe for making your own clay at home—perfect for crafting those adorable animal friends.
Ingredients
- 2 cups all-purpose flour
- 1 cup salt
- 2 cups water
- 1 tablespoon vegetable oil
- 2 tablespoons cream of tartar
Instructions
- Mix Ingredients: In a large pot, combine flour, salt, and cream of tartar. Stir in water and vegetable oil until the mixture is smooth.
- Cook the Mixture: Place the pot over medium heat. Stir continuously until the dough begins to thicken and pulls away from the sides of the pot.
- Cool and Knead: Once the dough forms a ball, transfer it to a clean surface. Let it cool for a few minutes and then knead it until it’s smooth and elastic.
- Color Your Clay: If you want colored animals, you can mix in food coloring or paint once the dough is cool.
- Sculpt Your Animals: Now comes the fun part! Let your kids mold their favorite animals from the dough, adding details with tools or their hands.
Printable Recipe Card
Want just the essential recipe details without scrolling through the article? Get our printable recipe card with just the ingredients and instructions.