Look, I’m gonna level with you—Halloween class parties are basically a battlefield. You’ve got 25 sugar-crazed kids bouncing off the walls, parents judging your Pinterest-worthiness, and about 30 minutes to pull something together before you sprint out the door. Been there, done that, got the orange frosting stains to prove it.
Here’s the thing: you don’t need to be a culinary genius to win Halloween. I’ve cracked the code on snacks that look impressive but won’t have you stress-eating candy corn at 2 AM the night before the party. We’re talking three ingredients max, minimal prep, and maximum “wow” factor.
Why 3-Ingredient Snacks Are Your Secret Weapon
Ever noticed how the simplest recipes are the ones you actually make? Yeah, me too. Last year I pinned about 47 “amazing Halloween treats” and made exactly zero of them. This year, I’m keeping it real.
Three-ingredient snacks mean fewer things to forget at the store (we’ve all driven home realizing we forgot the sprinkles). They’re budget-friendly, which matters when you’re also buying costumes and enough candy to feed a small army. Plus, kids don’t care if you used 12 ingredients or 3—they just want something cool-looking that tastes good.
I’ve tested these with my own crew, and trust me, the simplicity doesn’t mean boring. These snacks get gobbled up faster than you can say “trick or treat.”
Monster Eyeball Grapes
What You Need:
- Green grapes
- White chocolate chips
- Mini chocolate chips (or a food-safe marker)
This one’s almost embarrassingly easy, but kids go absolutely nuts for it. I made these for my daughter’s party last year, and the teacher actually asked for the recipe. The recipe! For grapes with chocolate chips! 🙂
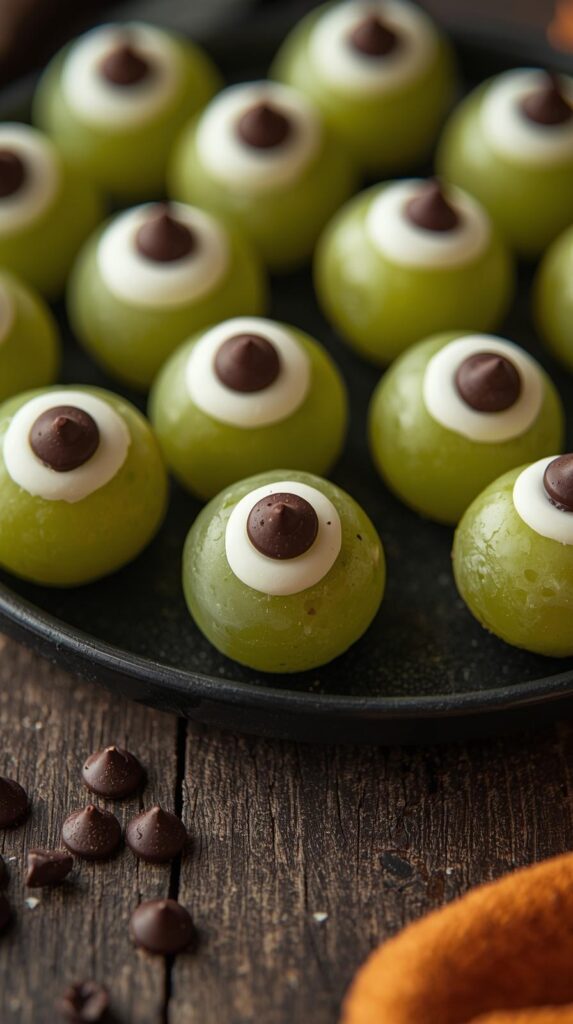
Here’s how you do it: Wash your grapes and pat them dry. Melt the white chocolate chips (microwave works fine—30 seconds at a time, stir between). Dip the bottom of each white chocolate chip in the melted chocolate and stick it on a grape. Before it sets, add a mini chocolate chip in the center as the “pupil.”
Pro tip: Make these the morning of the party. They get a little weepy if you prep them the night before. Also, if you’re feeling fancy (or if you’re like me and burned the white chocolate), just use a black food marker to draw the pupils. Nobody will know, and honestly? They look just as creepy.
The best part? These are actually healthy-ish. Parents appreciate that amidst all the sugar chaos, and you can feel slightly less guilty about the candy corn you’ve been stress-eating.
Pumpkin Cheese Balls
What You Need:
- String cheese sticks
- Orange bell pepper strips (or baby carrots)
- Pretzel sticks
This snack makes me laugh every time because it looks so stinking cute but takes about 2 minutes per “pumpkin.” I’ve made these while on a work call. That’s how easy they are.
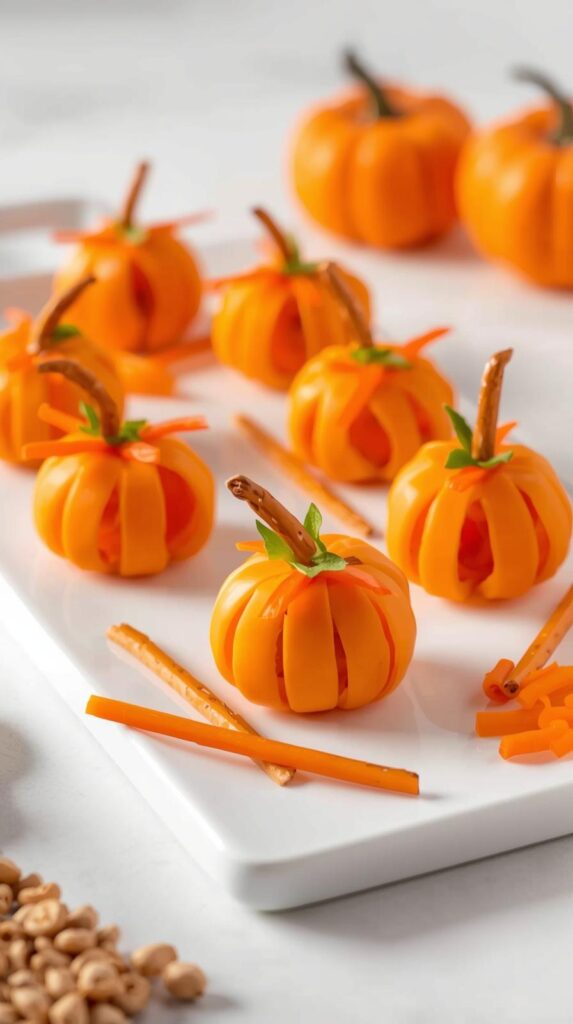
Unwrap your string cheese sticks and slice them into thirds. Take a pretzel stick and snap off a small piece—about half an inch. Poke it into the top of each cheese round as the “stem.”
For the leaves, cut your bell pepper into tiny strips (or if you’re pressed for time, those pre-cut baby carrots work too). Tuck a small piece next to the pretzel stem.
Real talk: Sometimes my “pumpkins” look more like weird cheese blobs with sticks in them, and you know what? The kids still demolish them. They’re getting protein, and they’re festive. That’s a win in my book, IMO.
If you want to get really creative, you can use a toothpick to draw jack-o’-lantern faces on the cheese with a food-safe marker. But honestly? That’s extra credit. The basic version is perfectly party-worthy.
Mummy Bananas
What You Need:
- Bananas
- White chocolate or yogurt-covered pretzels (melted)
- Mini chocolate chips
I’ve made these so many times that I can do them in my sleep. They’re adorable, they’re quick, and they don’t require an oven—which is crucial when you’re already baking three dozen cupcakes for the bake sale.
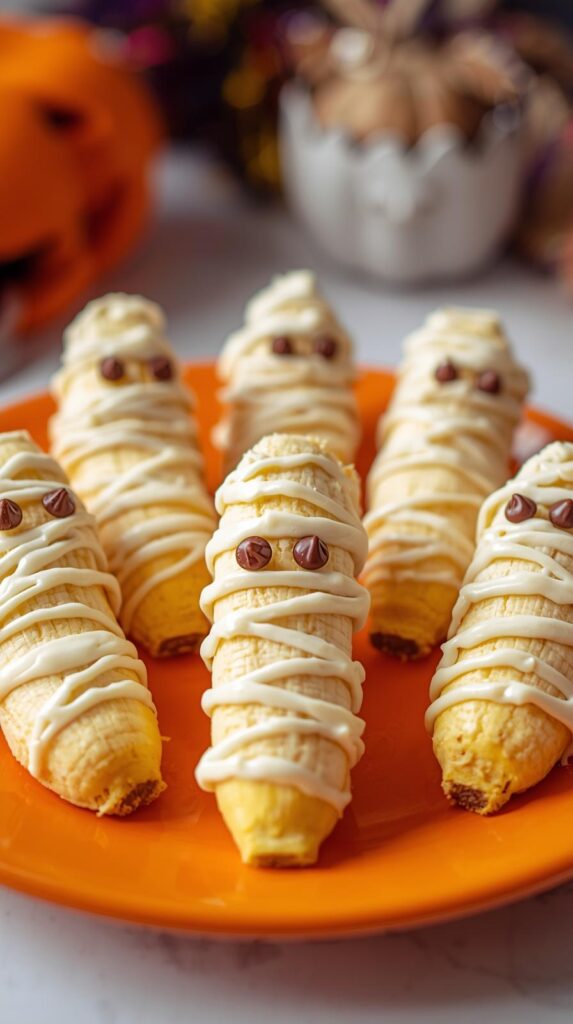
Peel your bananas and cut them in half. Melt your white chocolate (or those yogurt-covered pretzels—they melt great and add a nice crunch). Drizzle the melted chocolate back and forth across each banana half in a zigzag pattern. Leave a gap near the top for the “face.”
Before the chocolate sets, press two mini chocolate chips into the gap for eyes. Boom. Mummies.
FYI: These are best made fresh. Bananas brown, chocolate gets weird—just make them the morning of and keep them cool. I’ve tried making them the night before exactly once, and let’s just say they looked more “zombie” than “mummy” by party time. :/
The kids love these because they’re interactive—they enjoy peeling the chocolate “bandages” off while they eat. Parents love them because it’s fruit. Everyone wins.
Ghost Strawberries
What You Need:
- Strawberries (with the stems on)
- White chocolate
- Mini chocolate chips
Remember when I said I’m not a Pinterest mom? Well, these make me look like one, and I’m not mad about it. They’re ridiculously photogenic and stupid easy.
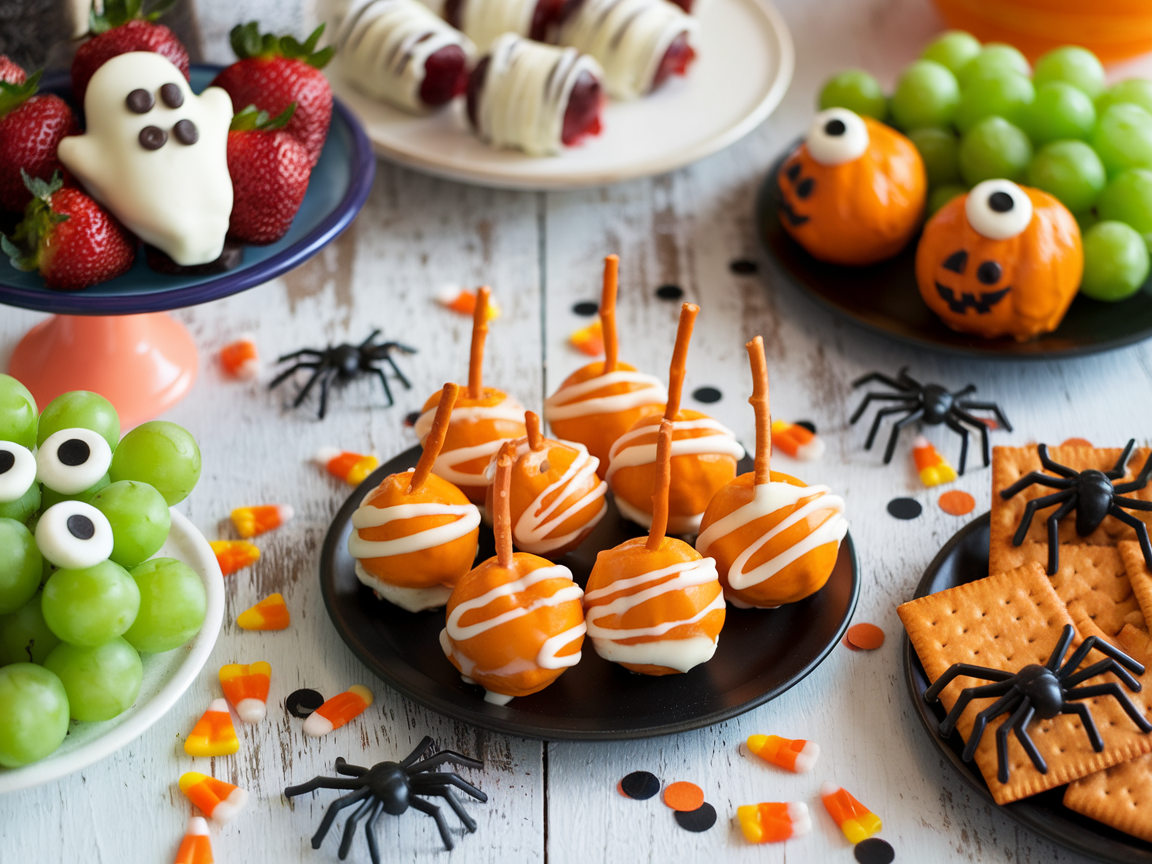
Wash and thoroughly dry your strawberries—water and chocolate are mortal enemies. Melt your white chocolate (sensing a theme here?). Hold each strawberry by the stem and dip it in the chocolate, leaving just the green top exposed. Place them on parchment paper.
While the chocolate is still wet, add two mini chocolate chip eyes. You can also add a little chocolate chip mouth if you’re feeling ambitious, but honestly, the two-dot eyes are enough. They look like tiny ghosts, and they’re gone in about 5 seconds at parties.
Pro tip: Use good quality white chocolate if you can. The cheap stuff gets clumpy and weird. Trust me, I learned this the hard way when my “ghosts” looked more like lumpy blobs at my son’s party.
These are also great if you’re making a fall charcuterie board for the adults while the kids party. Just saying—you deserve a snack too.
Pumpkin Patch Pudding Cups
What You Need:
- Chocolate pudding cups
- Oreos (crushed)
- Candy pumpkins or orange M&Ms
This is the snack I make when I’m really phoning it in but still want to look like I tried. It’s almost not even a recipe, but the kids think it’s the coolest thing ever.
Buy individual chocolate pudding cups (or make your own if you’re feeling motivated—no judgment either way). Crush up some Oreos in a ziplock bag. Let the kids help with this part; they love smashing things, and it burns off some of that pre-party energy.
Sprinkle the crushed Oreos on top of each pudding cup to look like “dirt.” Stick a few candy pumpkins or orange M&Ms on top. Done. You’ve made a “pumpkin patch.”
Here’s the secret: Nobody cares that you didn’t make this from scratch. The kids are thrilled because they get pudding and crushed cookies. The presentation makes it festive. And you didn’t have to turn on your oven.
I’ve brought these to parties while also juggling easy crockpot meals at home because October is insane. The beauty of simple snacks is they don’t add stress to your already packed schedule.
Spider Crackers
What You Need:
- Round crackers (like Ritz)
- Peanut butter or cream cheese
- Pretzel sticks
This snack is my go-to when I need something savory to balance out all the sugar. Plus, it’s allergy-friendly if you use cream cheese instead of peanut butter—always check with the teacher first about nut allergies.
Spread peanut butter or cream cheese on a cracker. Top with another cracker to make a sandwich. Break pretzel sticks in half and insert four on each side as “legs.” Add two mini chocolate chip eyes if you want, but honestly, they look like spiders without them.
Real talk: These look slightly deranged sometimes. The pretzels stick out at weird angles, and the crackers slide around. But kids think they’re hilarious, and that’s what matters. I’ve learned to embrace the imperfection.
Make these assembly-line style. Get all your crackers spread, all your pretzels broken, then assemble. It goes way faster, and you’ll be done before the next episode of whatever you’re stress-watching ends.
Candy Corn Kabobs
What You Need:
- Pineapple chunks
- Orange slices (or mandarin segments)
- Marshmallows (or banana slices)
Ever wondered why candy corn is a thing when actual fruit exists? Me too. These kabobs are what candy corn wishes it could be—colorful, festive, and actually tasty.
Thread your fruit onto wooden skewers in candy corn order: pineapple (yellow) on bottom, orange slice in the middle, marshmallow or banana (white) on top. The color pattern is what makes these work.
Pro tip: Break the pointy ends off the skewers if you’re serving these to younger kids. Safety first, festive second. Also, these are great for kids with dye allergies or sugar restrictions. You’re being inclusive and festive at the same time.
I love these because they’re naturally sweet, colorful, and you can prep them in the morning without them getting gross. Plus, they look impressive lined up on a platter, like you actually planned something.
Witch Hat Cookies
What You Need:
- Chocolate cookies (like Oreos or Keebler Fudge Stripes)
- Hershey’s Kisses
- Orange icing or melted chocolate
This is technically a cheat because store-bought icing might push us over three ingredients, but if you use melted chocolate as “glue,” we’re golden.
Place a small dollop of orange icing or melted chocolate in the center of each cookie. Press a Hershey’s Kiss onto it, pointed side up. The cookie is the brim, the Kiss is the hat. Done.
Here’s my confession: Half the time I don’t even use the orange icing. I just press the Kiss on and call it good. The kids don’t care. They’re excited about getting chocolate and cookies in one bite.
These are perfect for the kid who has 17 different food allergies because you can swap in allergy-friendly cookies and chocolate. Always be that parent who brings the inclusive snack—trust me, the other parents notice and appreciate it.
Frankenstein Kiwi Pops
What You Need:
- Kiwis
- Mini chocolate chips
- Popsicle sticks (optional)
I’m throwing in one that requires zero melting, zero baking, and honestly, barely any effort. These are my emergency backup snack.
Peel your kiwis and slice them into thick rounds. If you’re feeling fancy, insert a popsicle stick into each one. Press two mini chocolate chips into each slice for eyes. Use a third chocolate chip broken in half for a zig-zag mouth.
The beauty of this: Kiwis are naturally Frankenstein-green. You’re just adding a face. That’s it. I’ve made these while simultaneously helping with homework and signing permission slips. They’re that easy.
Kids either love kiwi or hate it, so know your audience. But for the kids who love it, these are a huge hit. Plus, vitamin C! You’re basically a health hero.
Tips for Halloween Party Success
Let me share some hard-won wisdom from multiple years of class party chaos:
Make extras. Seriously, make way more than you think you need. Kids always want seconds, and there’s always that one parent who forgot to eat breakfast.
Prep the night before when possible. Wash fruit, cut cheese, crush cookies. Anything that doesn’t involve chocolate or bananas can be prepped ahead.
Bring wet wipes. This isn’t a snack ingredient, but trust me. Chocolate, markers, and 25 kids = you’ll need them.
Label everything. Especially if you’re using nut products. Allergies are serious, and clear labeling helps everyone.
Don’t stress perfection. My first year, I tried to make everything Instagram-worthy. My mummy bananas looked drunk, my ghost strawberries looked more like blobs, and you know what? The kids inhaled everything anyway.
The Real Secret
Want to know what I’ve learned after years of class parties? The kids don’t care about perfection. They care that you showed up, that the snacks are fun, and that there’s enough for everyone to have some.
I used to stress about making everything Pinterest-perfect, but honestly? The year I brought slightly lopsided spider crackers and called them “spooky spiders,” the kids thought they were the coolest thing ever. The imperfection made them more fun.
Three-ingredient snacks work because they’re achievable. You’re not setting yourself up for failure by attempting some 15-step recipe that requires specialty ingredients from three different stores. You’re working smarter, not harder.
Make It Fun
Here’s my final piece of advice: involve the kids if you can. My daughter loves helping me press chocolate chips into banana mummies or crushing Oreos for pudding cups. Yeah, it takes slightly longer, and the kitchen gets messier, but she remembers making Halloween treats with me. That’s worth more than perfect-looking snacks.
Plus, when kids help make the food, they’re way more excited to eat it at the party. And they tell all their friends “I made these!” which is adorable.
Your Halloween Snack Game Plan
So here’s what I’m making for this year’s party: ghost strawberries (because they’re my most reliable), mummy bananas (because they’re quick), and pumpkin cheese balls (for the savory option). Three snacks, all with three ingredients, all achievable before 8 AM on party day.
I’ll probably throw in a bag of candy corn for good measure—because tradition—but these homemade snacks are what’ll actually get eaten.
The best part? When the party’s over and I’m cleaning up, I won’t be exhausted and resentful. I’ll have actually enjoyed the process, and I might even have time to eat lunch before pickup. Now that’s what I call a Halloween miracle.
Go forth and make your ridiculously simple snacks. The kids will love them, the parents will be impressed, and you’ll actually survive October without losing your mind. You’ve got this! 🎃

