Easter is just around the corner, and if you’re anything like me, you’re ready to ditch the same old boring egg dye and try something spectacular this year! Whether you’re crafting with kids, making a stunning Easter display, or just having fun with some creative time, I’ve got you covered with 26 unique Easter egg decorating ideas. I’ll walk you through each one with step-by-step instructions, so grab your eggs and let’s get cracking!
1. Watercolor Wonder
Materials: Hard-boiled eggs, watercolor paints, paintbrushes, water, paper towels
- Wet your paintbrush and dip it into watercolor paint.
- Lightly brush the egg’s surface, letting the colors blend.
- Dab with a paper towel for a dreamy effect.
- Let dry before handling.
2. Glitter Glam
Materials: Hard-boiled eggs, craft glue, fine glitter, small bowl, spoon, drying rack
- Brush glue onto half of the egg.
- Hold it over a bowl and sprinkle glitter.
- Let dry, then repeat on the other side.
Now, your eggs are sparkling like magical fairy treasures!
3. Marbleized Magic
Materials: Hard-boiled eggs, shaving cream, food coloring, toothpick, baking sheet
- Spread shaving cream onto a baking sheet.
- Drip food coloring onto the surface and swirl with a toothpick.
- Roll the egg in the mixture and let it sit for 10 minutes.
- Wipe off and enjoy the marbled masterpiece!
4. Gold Leaf Elegance
Materials: Hard-boiled eggs, gold leaf sheets, craft glue, soft brush
- Dab glue onto the egg in random patches.
- Gently press gold leaf onto the sticky areas.
- Use a soft brush to smooth out any excess.
These eggs look like they belong in a royal Easter basket!
5. Confetti Explosion
Materials: Hard-boiled eggs, tissue paper, glue, paintbrush
- Cut tissue paper into tiny squares.
- Brush a thin layer of glue onto the egg.
- Stick on the tissue paper pieces randomly.
- Seal with another layer of glue.
It’s like a mini party in your hands!
6. Tie-Dye Swirl
Materials: Hard-boiled eggs, paper towels, food coloring, spray bottle, vinegar
- Wrap the egg in a paper towel.
- Drop food coloring onto the towel.
- Spray with vinegar.
- Let sit, then unwrap to reveal the tie-dye magic.
A rainbow explosion in every egg!
7. Pressed Flower Beauty
Materials: Hard-boiled eggs, small flowers, Mod Podge, paintbrush
- Pick tiny flowers and press them between books for a few hours.
- Brush Mod Podge onto the egg.
- Gently place a flower on the glue.
- Seal with another thin coat of Mod Podge.
Nature’s artwork, right on your Easter eggs!
8. Sharpie Doodles
Materials: Hard-boiled eggs, fine-tip permanent markers
- Grab a marker and start doodling—patterns, flowers, smiley faces, whatever you like!
- Let dry and enjoy your custom designs.
Your eggs, your style, your masterpiece!
9. Chalkboard Fun
Materials: Hard-boiled eggs, chalkboard paint, chalk
- Paint eggs with chalkboard paint.
- Let dry, then use chalk to draw designs.
The best part? You can erase and redesign whenever you want!
10. Decoupage Delight
Materials: Hard-boiled eggs, pretty napkins, Mod Podge, paintbrush
- Cut napkins into small pieces.
- Brush Mod Podge onto the egg.
- Gently press napkin pieces onto the glue.
- Seal with another layer of Mod Podge.
Your eggs will look like they came from an expensive boutique!
11. Neon Glow Eggs
Materials: Hard-boiled eggs, neon paint, blacklight
- Paint eggs using neon colors.
- Let them dry and place them under a blacklight.
Watch them glow like mini lanterns in the dark!
12. Wax Resist Designs
Materials: Hard-boiled eggs, white crayon, dye
- Use a white crayon to draw patterns on the egg.
- Dip into dye and let dry.
The wax resists the dye, revealing your secret design!
13. Silk-Dyed Eggs
Materials:
- Hard-boiled eggs
- 100% silk fabric (old silk ties work great!)
- Vinegar
- Water
- Pot
- Tongs
Instructions:
- Cut the silk fabric into squares large enough to wrap around an egg.
- Wrap the egg tightly in the silk, ensuring the patterned side is touching the egg. Secure the fabric with a twist tie.
- Wrap the egg again with a plain cotton cloth and secure it.
- In a pot, boil the wrapped eggs in a mixture of ½ cup vinegar and water for about 20 minutes.
- After boiling, let the eggs cool down. Once cooled, unwrap the fabric to reveal beautiful designs transferred onto the egg!
14. Puffy Paint Fun
Materials:
- Hard-boiled eggs
- Puffy paint (various colors)
Instructions:
- Using the puffy paint, create fun, raised designs on your egg.
- You can use your imagination! Try dots, swirls, or even little flowers.
- Allow the puffy paint to dry completely before handling.
- Once dry, your egg will have a cool 3D texture to it!
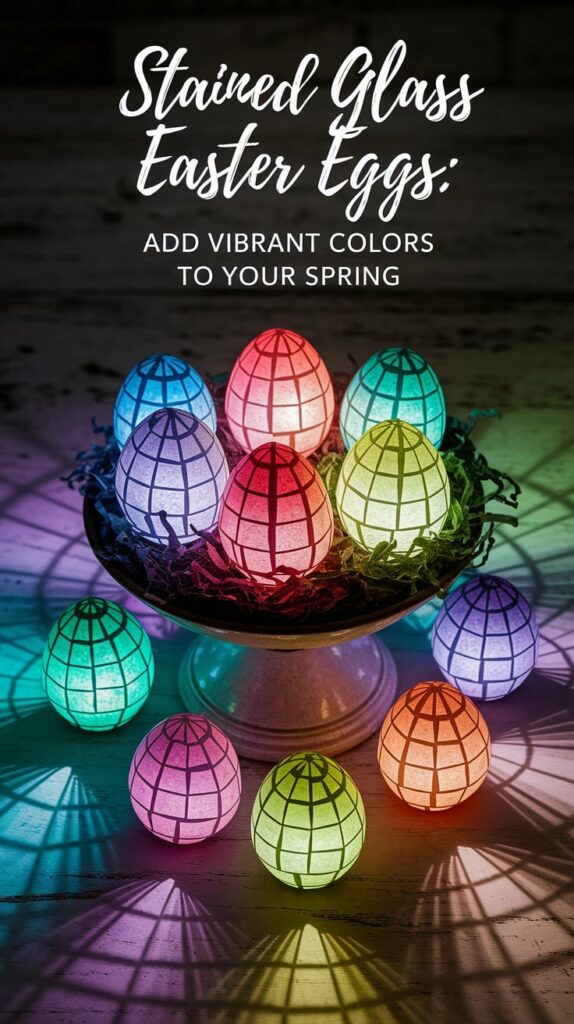
15. Stained Glass Eggs
Materials:
- Hard-boiled eggs
- Tissue paper in various colors
- Mod Podge or craft glue
- Paintbrush
- Scissors
Instructions:
- Cut the tissue paper into small squares.
- Apply a layer of Mod Podge to the surface of your egg using a paintbrush.
- Gently place the tissue paper squares onto the egg, overlapping them to mimic stained glass.
- Once covered, apply another layer of Mod Podge over the tissue paper to seal it.
- Let the egg dry completely, and voilà! You have beautiful stained-glass eggs.
16. Nature Prints

Materials:
- Hard-boiled eggs
- Leaves, flowers, or grass
- Pantyhose or mesh fabric
- Ribbon
- Vinegar and water
Instructions:
- Place a leaf, flower, or piece of grass against the egg.
- Cut a piece of pantyhose or mesh fabric large enough to wrap around the egg and hold the plant in place.
- Tie the fabric tightly with a ribbon, making sure the plant stays in contact with the egg.
- Boil the egg in a mixture of water and ½ cup vinegar for about 15 minutes.
- Let the egg cool, then unwrap the fabric and admire your beautiful nature prints!
17. Glitter Galaxy Eggs
Materials:
- Hard-boiled eggs
- Glitter (various colors)
- Spray adhesive
- Paintbrush
- Black paint (optional)
Instructions:
- Optionally, paint the egg with black paint to create a “night sky” base.
- Lightly spray the egg with adhesive.
- Sprinkle glitter over the surface, using different colors to create a galaxy effect.
- Let the egg dry before handling, and enjoy your sparkly, cosmic creation!
18. Washi Tape Eggs
Materials:
- Hard-boiled eggs
- Washi tape (various colors/patterns)
- Scissors
Instructions:
- Cut small pieces of washi tape and arrange them in fun patterns on the egg.
- You can make stripes, zigzags, or even cover the egg in multiple layers of different tapes.
- Once you’ve arranged your design, trim any excess tape with scissors.
- These eggs are quick, fun, and oh-so-cute!
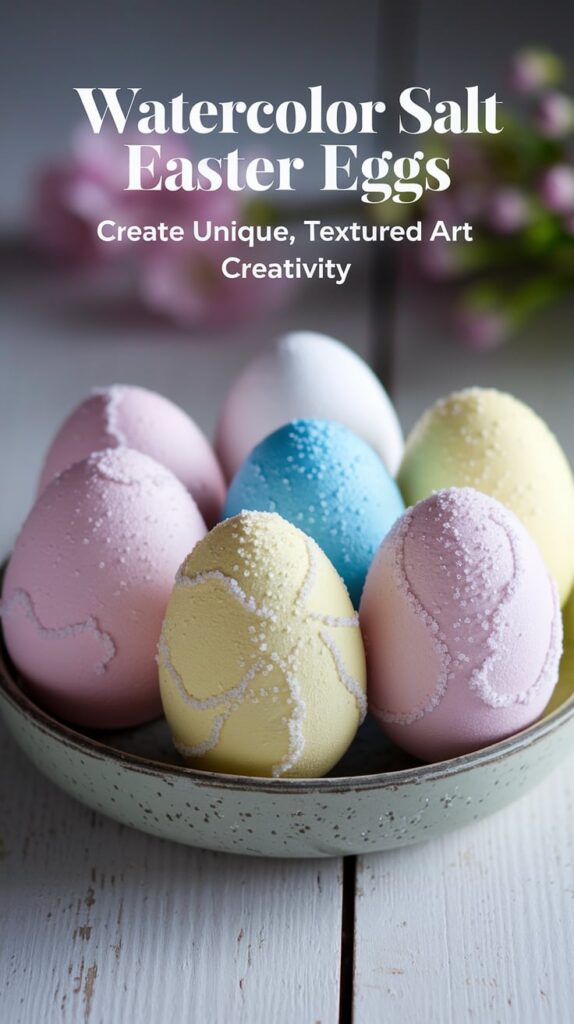
19. Watercolor Salt Eggs
Materials:
- Hard-boiled eggs
- Watercolor paints
- Salt
- Paintbrush
Instructions:
- Paint the egg with watercolor paints in different colors.
- While the paint is still wet, sprinkle a bit of salt on top.
- Watch as the salt absorbs the paint and creates a unique, textured effect.
- Let the egg dry completely, and you’ll have a one-of-a-kind watercolor egg!
20. Tattooed Eggs
Materials:
- Hard-boiled eggs
- Temporary tattoos
- Water
Instructions:
- Select your favorite temporary tattoo design.
- Cut out the tattoo and soak it in water for a few seconds.
- Carefully apply the tattoo to the surface of the egg.
- Smooth it out and remove the backing.
- You now have a tattooed egg that looks incredibly cool!
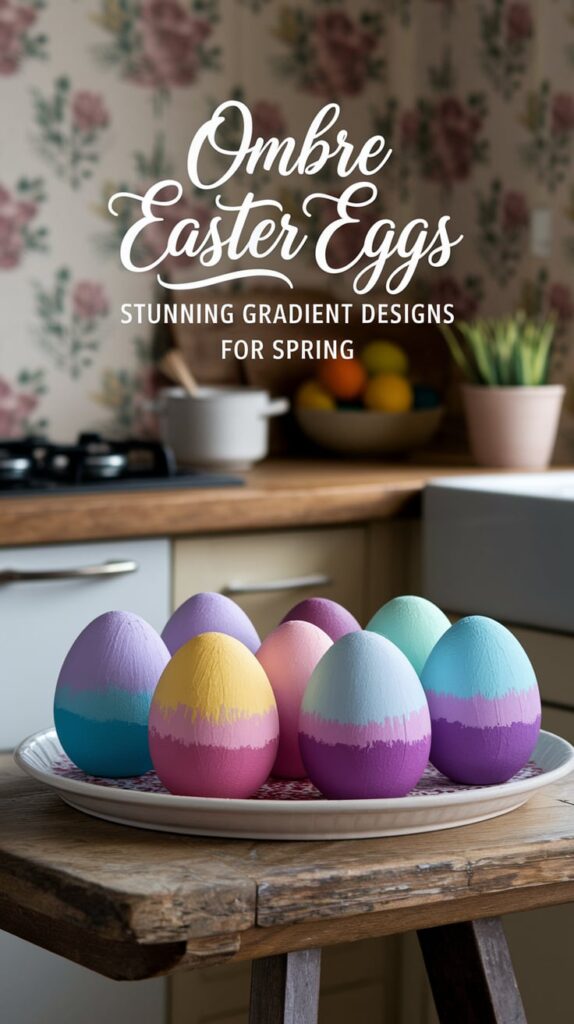
21. Ombre Eggs
Materials:
- Hard-boiled eggs
- Food coloring
- Bowls of water
Instructions:
- Fill a bowl with water and add several drops of food coloring.
- Dip the bottom of the egg into the water for a few seconds.
- Gradually move the egg higher into the water, allowing the color to fade as you go.
- Repeat with different colors if desired.
- You’ll create a stunning ombre effect with soft, blended colors.
22. Marble Nail Polish Eggs
Materials:
- Hard-boiled eggs
- Nail polish (various colors)
- Bowl of water
- Toothpicks
Instructions:
- Fill a bowl with water and add drops of nail polish in different colors.
- Use a toothpick to swirl the nail polish in the water to create a marble effect.
- Carefully dip the egg into the water, allowing the polish to coat the surface.
- Let the egg dry, and you’ll have a sleek, marbleized egg!
Easter egg decorating doesn’t have to be the same old dip-and-dye method. With these creative ideas, you’ll have a collection of eggs that are fun, unique, and totally Instagram-worthy. Try a few (or all 26!) and let me know which ones are your favorites. Happy crafting and happy Easter!
FAQs
Q: How long do decorated eggs last? A: If using hard-boiled eggs, they should be kept in the fridge and used within a week. If you want decorations to last longer, use wooden or plastic eggs!
Q: Can I eat the eggs after decorating them? A: Yes, but only if you use food-safe materials like natural dyes and edible markers. If you used glue, paint, or other non-edible items, keep them for decoration only.
Q: What’s the best way to display decorated eggs? A: Try an egg carton, a decorative basket, or even a nest made from shredded paper.
Q: Can I decorate eggs with younger kids? A: Absolutely! Just pick simple, mess-free techniques like stickers, washi tape, or crayons.


