
Creating a mini fairy garden is a fun and quick project that can brighten up any space! In just an hour, you can whip up delightful scenes like a Beach Paradise with sandy shores, an Enchanted Forest filled with moss and woodland critters, or a colorful Rainbow Wonderland bursting with flowers and painted rocks. If you’re looking for a step-by-step guide to get started, check out our post on How to Create a DIY Mini Fairy Gardens: A Magical Outdoor Craft for Kids.
Whimsical Forest Retreat
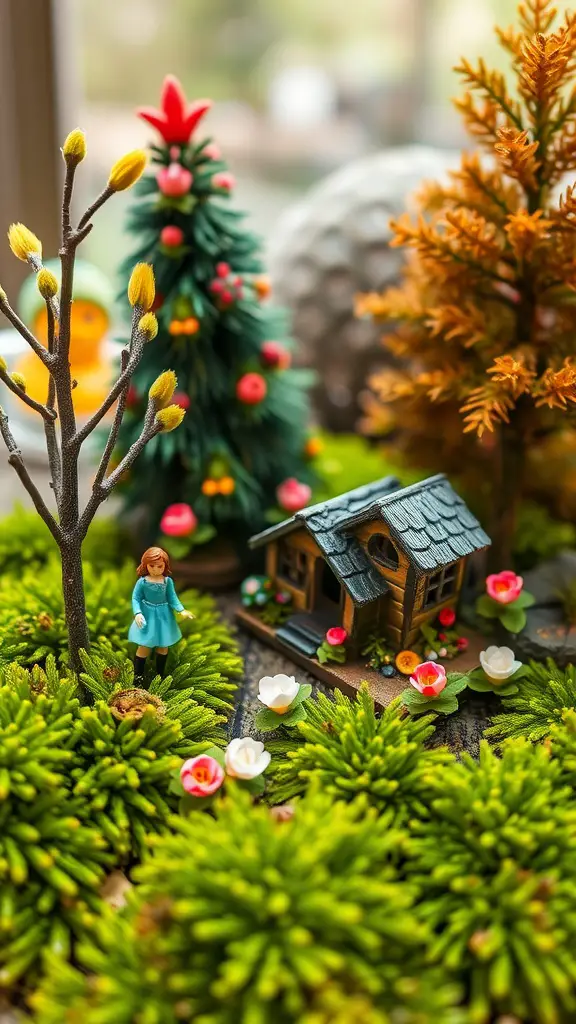
Creating a mini fairy garden is a fun way to add charm to any space. The image captures the essence of a whimsical forest retreat, complete with a cozy little house, vibrant greenery, and playful decorations. A miniature figure stands beside the house, making the scene feel alive and inviting.
To design your own whimsical forest retreat, gather some essential materials. You’ll need a small container or a shallow dish as your base. Fill it with potting soil or moss to create a lush ground cover. Add a tiny wooden or ceramic house as a centerpiece. Surround it with miniature trees, colorful flowers, and a few woodland animal figurines to bring the scene to life.
Enchanted Woodland Pathway
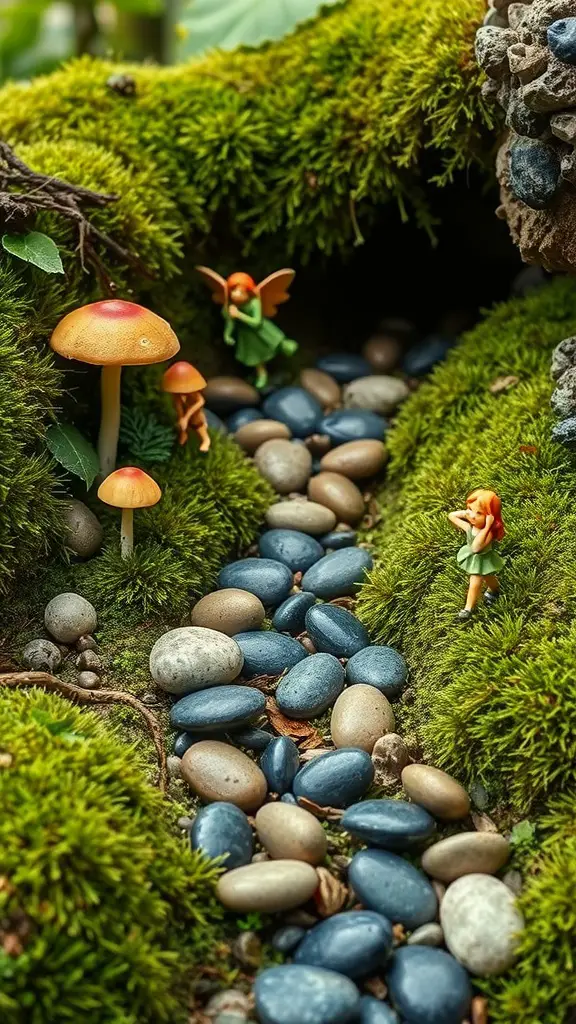
Creating an enchanted woodland pathway in your mini fairy garden can be a delightful project. Picture small stones forming a winding path through vibrant green moss. Tiny fairy figurines can add charm to the scene, bringing a sense of magic and wonder.
To build this pathway, start with some materials. You’ll need smooth pebbles, moss, and miniature fairy figures. Start by laying out the path using the pebbles to create a winding route. Fill the spaces between the stones with moss to give it a lush, natural look.
Next, you can add some decorations like small mushroom figurines or woodland animal figures to enhance the fairy-tale vibe. Consider using twigs and leaves for additional texture.
Charming Beach Oasis
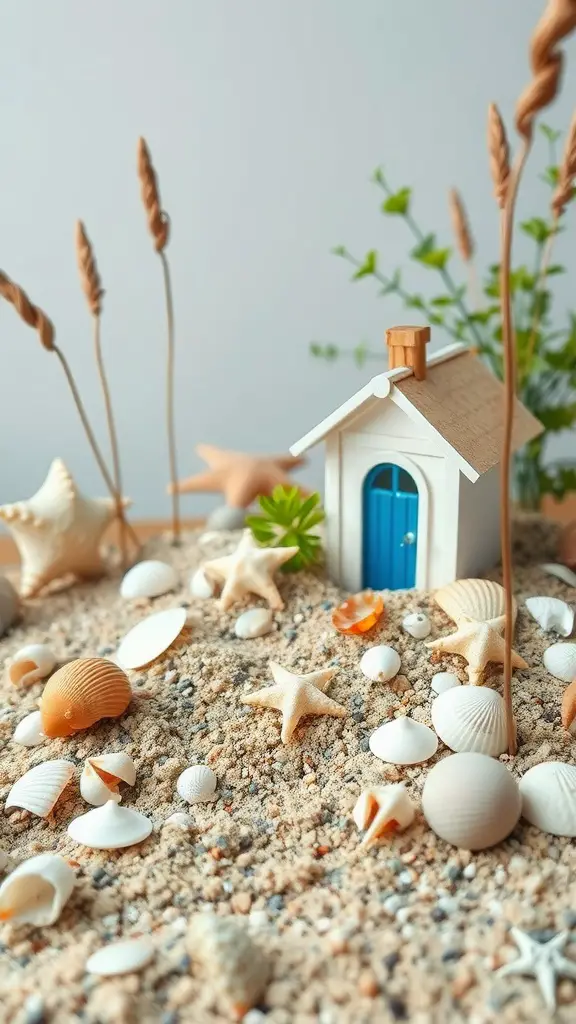
Create a delightful beach oasis in your home with just a few simple materials. This charming setup features a tiny house surrounded by sandy textures, seashells, and decorative elements that transport you to a sunny shoreline.
To build your Beach Paradise, start with a base of sand. Gather tiny seashells, starfish, and other beach-themed decorations to enhance the look. Place a small, whimsical house at the center for a focal point.
For added flair, consider using some greenery, like small plants or twigs representing beach grass. This can create a natural vibe that complements the sandy landscape.
If you want to mix things up, try building an Enchanted Forest instead. Use moss and twigs, adding woodland animal figurines for a magical touch. Alternatively, create a Rainbow Wonderland with colorful flowers, painted rocks, and a miniature rainbow, bringing vibrant colors into your fairy garden.
Vintage Tea Party Scene
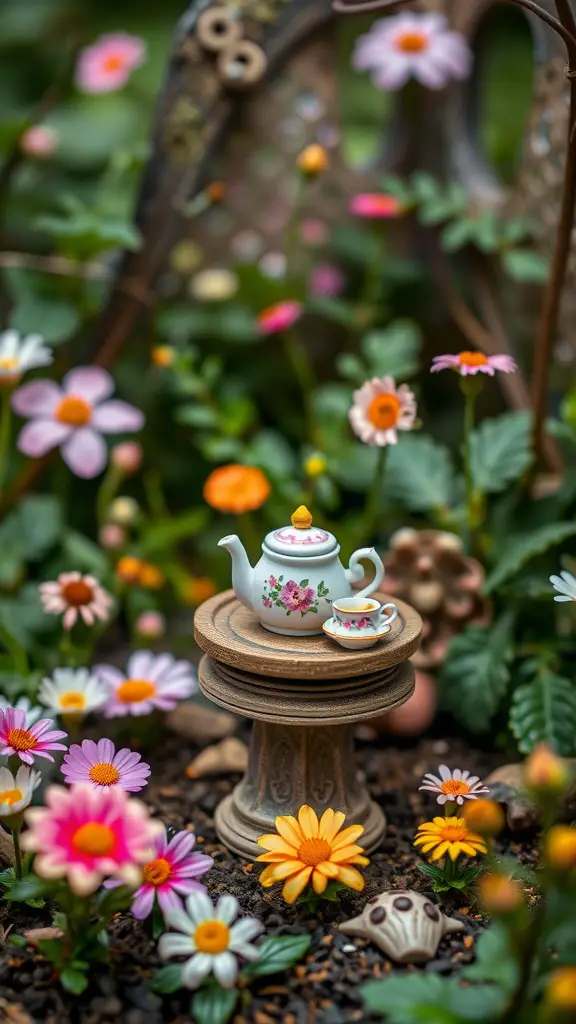
Step into a charming miniature world with a vintage tea party scene. A delicate teapot sits atop a whimsical pedestal, surrounded by colorful flowers. This setup makes you feel like you’ve stumbled upon a delightful gathering in a fairy garden.
The flowers, in shades of pink, yellow, and white, add a cheerful touch. Tiny seashells rest among the blooms, giving it a beachy vibe that blends well with the tea party theme.
To create your own vintage tea party scene, gather materials like a small teapot, a base for the stand, and artificial flowers. You can use items from around your home or a local craft store.
Magical Fairy Castle
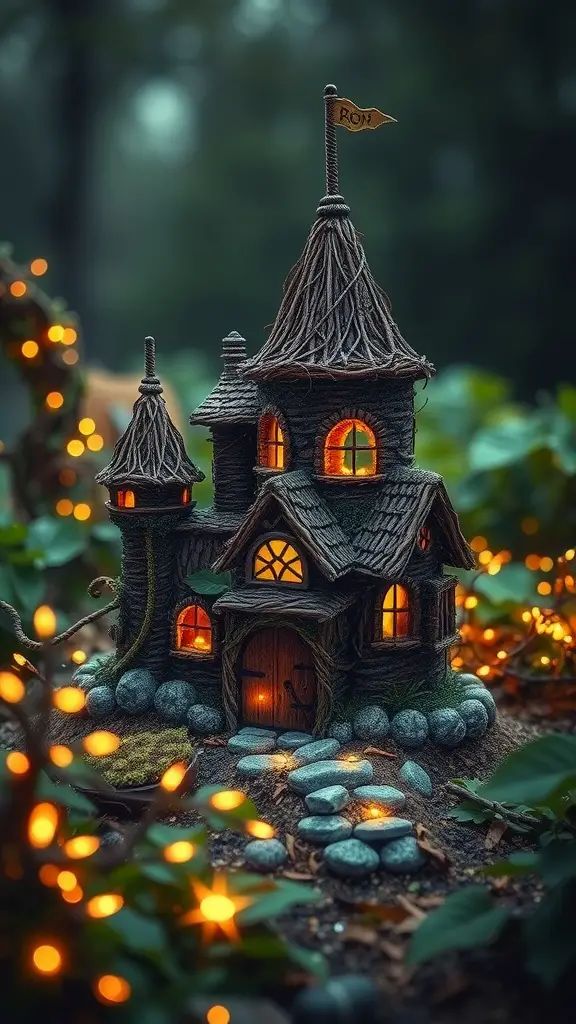
Create a stunning fairy castle that brings a touch of magic to your garden. This enchanting little home features whimsical details and glowing lights, making it a perfect centerpiece for any mini fairy garden.
To build your own fairy castle, start with materials like small stones, twigs, and miniature lights. You’ll also need a small structure that resembles a castle, which you can either buy or create using sturdy cardboard or wood.
Begin by laying a foundation of pebbles or small rocks to form a path leading to the castle. This adds character and guides the eye. Next, arrange twigs around the base and create a cozy entryway. You can use moss to give a lush feel, adding some natural greenery.
For a Beach Paradise theme, consider adding sand and tiny seashells around the castle, along with beach-themed decorations like surfboards or beach chairs.
If you prefer an Enchanted Forest vibe, incorporate moss, twigs, and tiny woodland animal figurines to enhance the fairy tale atmosphere. For a Rainbow Wonderland, colorful flowers, painted rocks, and a miniature rainbow will make the scene pop with joy.
Finish by placing the castle among fairy lights to create a warm glow during the evening. This magical touch will make your fairy castle a delightful sight!
Secret Garden Hideaway
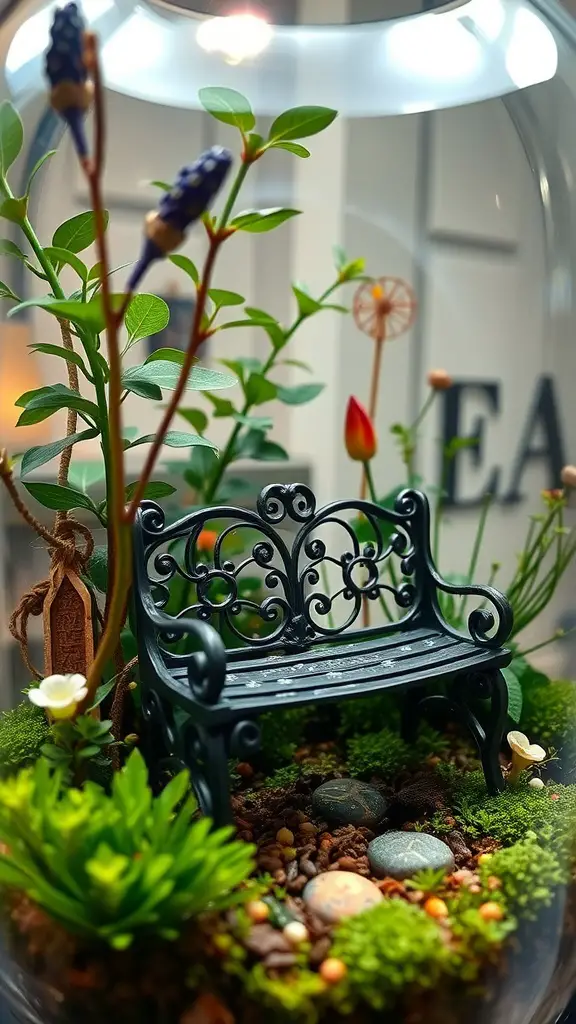
Creating a Secret Garden Hideaway is a delightful way to bring a touch of whimsy into your space. This mini fairy garden features a charming black bench surrounded by lush greenery, colorful flowers, and small decorative accents. It’s the perfect spot for imaginary fairies to relax and enjoy their beautiful surroundings.
To build your own Secret Garden Hideaway, gather materials like a small glass container, soil, and a variety of plants. Consider low-maintenance options like succulents or moss for easy care. Add decorative elements such as tiny benches, figurines, and pebbles to complete the scene.
Here’s a simple step-by-step process:
Start by adding a layer of soil at the bottom of your container.
Arrange your plants, placing taller ones toward the back and shorter ones in the front.
Position your miniature bench and any other decorations where you like.
Finish with a sprinkle of decorative pebbles around the base of the plants.
Sunflower Haven
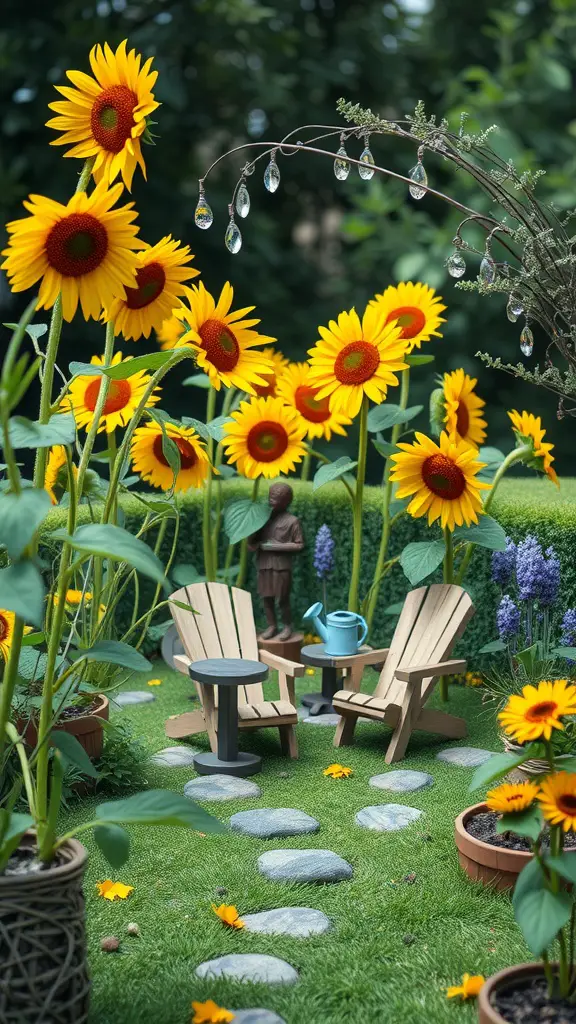
Welcome to your very own Sunflower Haven! This charming mini fairy garden bursts with cheerful sunflowers that create a bright and inviting atmosphere. The tall sunflowers stand proud, giving the garden a whimsical touch. The little seating area with Adirondack chairs is perfect for tiny visitors to relax and enjoy the view.
To create this delightful setup, start with a base made of artificial grass. Lay down a path of smooth pebbles leading to the seating area, making it easy for garden fairies to stroll around. Use small pots for additional flowers, and add a few decorative elements like a watering can and a tiny statue to bring the garden to life.
Gnome Village Retreat
Creating a Gnome Village Retreat in your mini fairy garden is a delightful project that sparks joy and creativity. Picture this: charming little homes with colorful roofs, surrounded by lush greenery and cheerful gnome figurines. It’s a magical escape right in your backyard!
To set up your gnome village, gather materials like small stones, artificial grass, and colorful, weather-resistant gnome figures. Start by laying down a base of artificial grass for a lush look. Use stones to create winding paths leading to each gnome home.
Each house can be unique. For the roofs, paint them vibrant colors. Arrange your gnomes throughout the village, giving each one a special spot. A gnome holding a watering can can be by a flower bed, while another can greet visitors at the entrance.
Don’t forget the flowers! Marigolds or daisies add pops of color. You can even use tiny pots or planters to create a garden feel. This retreat will surely bring smiles and spark imagination!
Mini Garden of Wishes
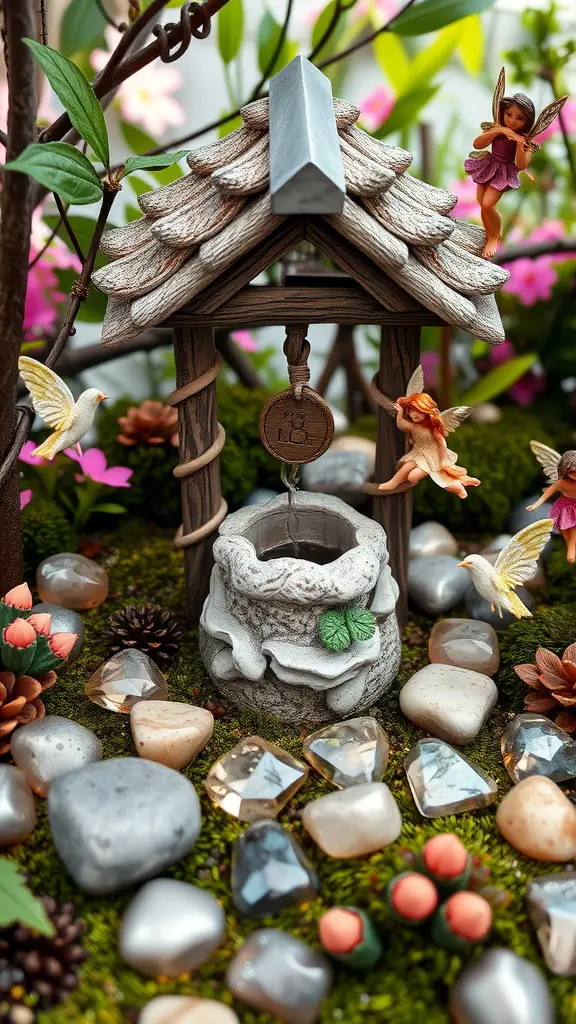
Creating a Mini Garden of Wishes is a delightful way to bring a touch of magic to your home. This enchanting scene often features a charming well, surrounded by sparkling stones, flowers, and playful fairy figurines. The well serves as a focal point where wishes can be imagined and dreams can flourish.
For a Beach Paradise version, gather materials like sand, tiny seashells, and beach-themed decorations. Start by filling a container with sand, then place your seashells around the edges. Add small beach chairs or umbrellas for that vacation vibe.
If you prefer an Enchanted Forest theme, use moss, twigs, and woodland animal figurines. Lay down a layer of moss as a base, arrange the twigs to create a natural border, and sprinkle in the animal figures to bring the forest to life.
A Rainbow Wonderland version can brighten up your garden. Use colorful flowers, painted rocks, and a miniature rainbow. Arrange the flowers in clusters and paint small rocks in various colors to mimic a rainbow effect. Top it off with a tiny rainbow arch to complete the look.
Fairy Unicorn Meadow
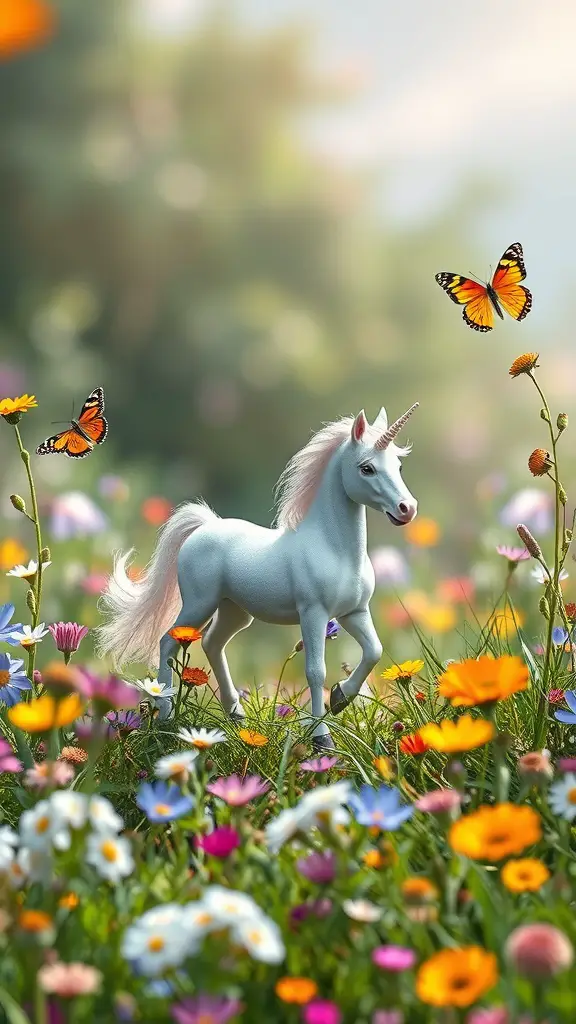
Picture a magical scene where a whimsical white unicorn prances through a colorful meadow filled with flowers. This enchanting setup captures the essence of a fairy garden, making it a perfect inspiration for your own creation.
To build your Fairy Unicorn Meadow, gather materials like miniature unicorn figurines, vibrant flowers (either real or artificial), and butterflies. You can use a shallow container or a garden patch as your base. Start by laying down a layer of soil or moss to create a natural look.
Next, plant your flowers around the unicorn. Choose a mix of colors for a lively atmosphere. You can also add small decorative butterflies to enhance the magical feel. Arrange them among the flowers to make it look like they are fluttering around.
Fanciful Flower Shop
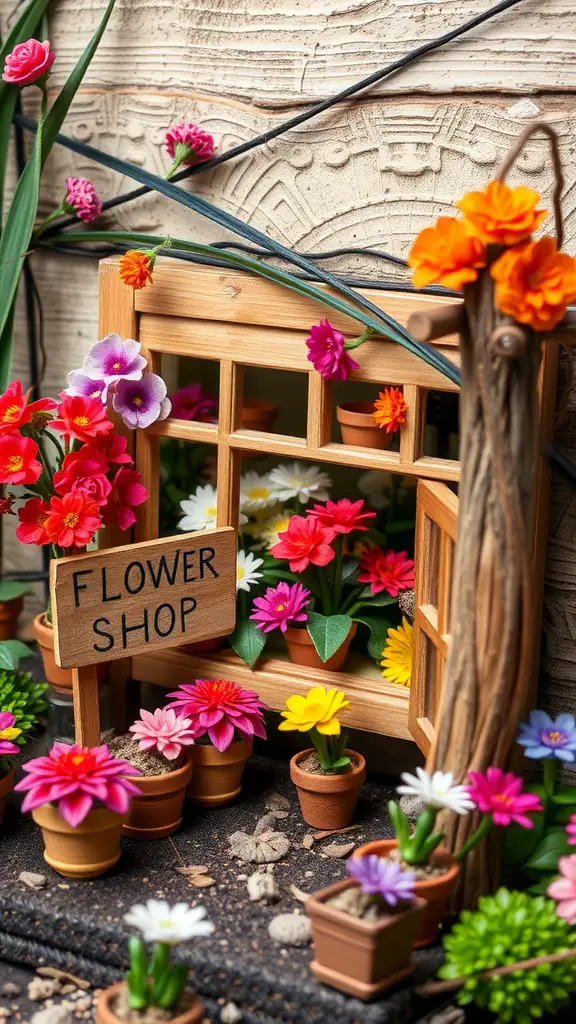
Step into a mini flower shop that bursts with color and charm! This delightful setup is perfect for anyone looking to create a little piece of paradise in their home. The shop features a wooden facade adorned with vibrant flowers in various pots. The bright blooms catch the eye and invite you to explore further.
To create your own fanciful flower shop, you’ll need a few materials. Start with a small wooden box or a miniature structure to represent the shop. Gather plastic or fabric flowers in various colors, and some tiny flower pots to display them. A small sign that reads ‘Flower Shop’ adds a quaint touch.
Here’s how to put it all together:
- Construct the shop using the wooden box; you can paint it if you like.
- Arrange the flower pots filled with flowers on the front of the shop and around the base.
- Create a sign using a small piece of wood or cardboard. Write ‘Flower Shop’ on it and place it near the entrance.
- Finish off with some decorative stones or pebbles to enhance the look of the path leading to your shop.
This flower shop can be a charming addition to your mini garden. You can also customize it with other themes!
Rustic Farmyard Charm
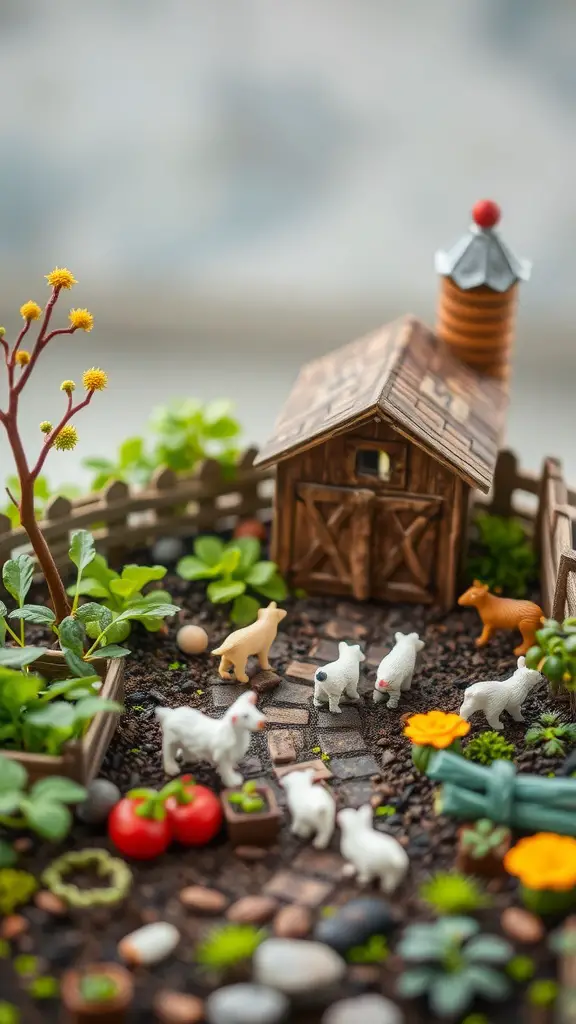
This mini fairy garden captures the essence of rustic farmyard charm. It features a quaint wooden barn, tiny farm animals, and a lovely pathway made of stones. The greenery adds life and a touch of nature to the scene. Brightly colored flowers bring a cheerful vibe, making it a perfect spot for little fairies to gather.
To create your own rustic farmyard fairy garden, start with a shallow container or wooden crate. You’ll need small stones for the pathway, a mixture of potting soil, and a variety of plants like succulents or moss for the greenery. Tiny farm figurines, such as cows, goats, and chickens, will complete the farm look. Add a small wooden barn or a decorative fence to give it that authentic farm feel.
Here’s a simple step-by-step process: First, fill your container with potting soil. Arrange the stones to form a pathway. Next, plant your succulents or moss around the pathway. Place the barn and figurines in their designated spots. Finally, sprinkle some colorful flowers for pops of color. This charming setup can come together in an hour and will bring joy to any space!
Forest Mushroom Wonderland
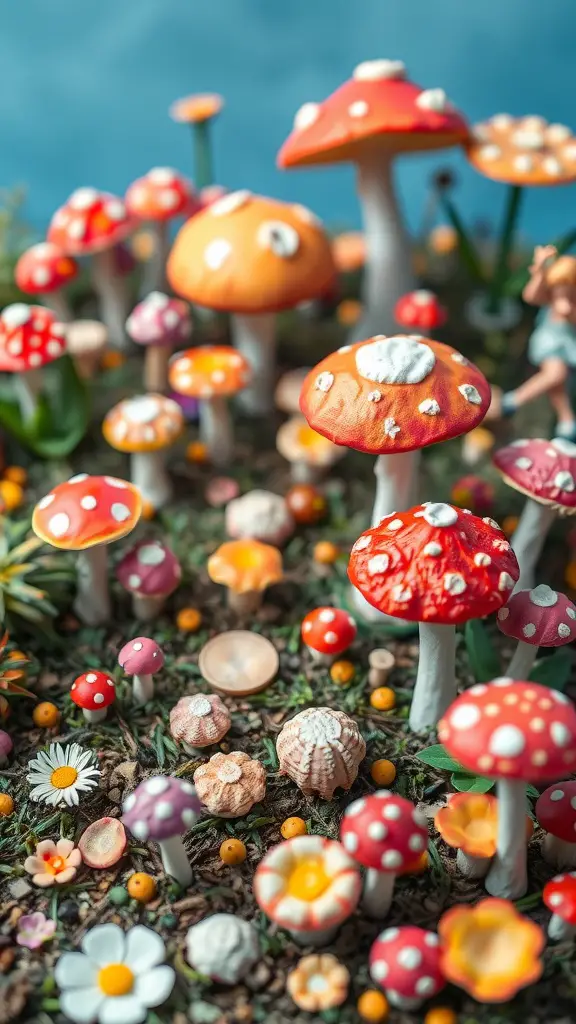
Create your own forest mushroom wonderland using simple materials. Start with a small container or a wooden box as your base. Cover the bottom with moss for a natural look. Gather various miniature mushrooms in different colors and sizes; these will become the stars of your fairy garden.
Scatter some small rocks or pebbles around for added texture. You can also include tiny flowers like daisies or colorful pebbles to enhance the garden’s charm. If you’d like, add a small figurine or two, perhaps a fairy or woodland creature, to bring your garden to life.
For added detail, consider painting or crafting some simple signs or pathways using twigs or painted stones. You can create a small pond using a blue marbles or glass beads, giving your fairy garden a magical touch.
This setup can be completed in just an hour, making it a perfect weekend project.
Lavender Dreamscape

Creating a Lavender Dreamscape is a delightful way to bring a touch of magic to your garden. This miniature fairy garden features lovely lavender plants that add a soothing fragrance and vibrant color. The charming gazebo in the background sets a whimsical scene, making it perfect for fairies to gather.
To start, gather some essential materials: lavender plants, small stones for pathways, a miniature gazebo, and decorative elements like tiny chairs or benches. First, select a suitable spot in your yard or a pot where you want to build your fairy garden.
Next, plant the lavender, ensuring they have enough space to grow. Arrange the stones to create a winding path leading to the gazebo. You can position the gazebo at the end of the path, giving it a focal point. Finally, add any extra decorations like small figurines or benches to complete the scene.
Celestial Night Sky
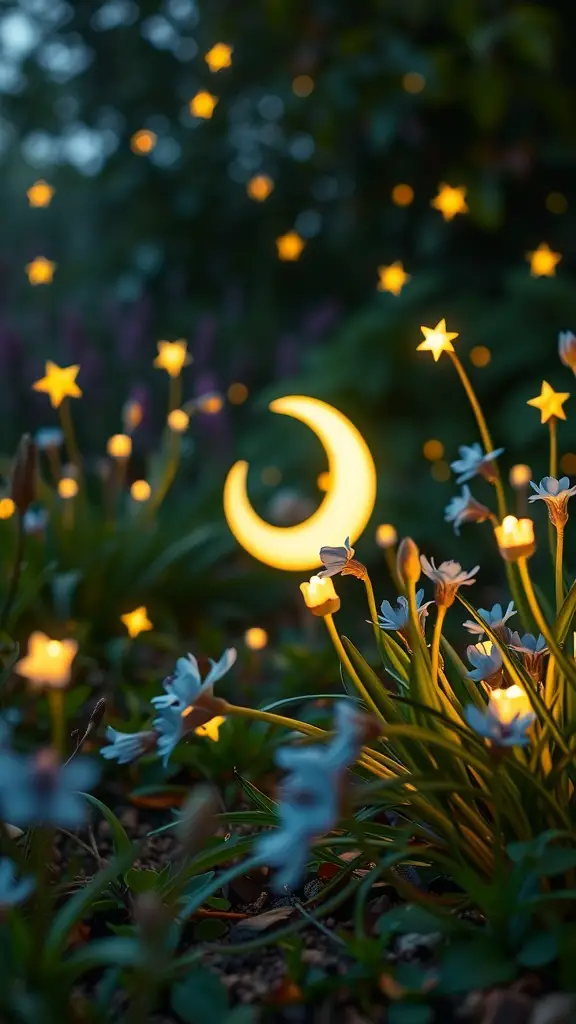
Creating a Celestial Night Sky in your mini fairy garden brings a magical touch that can be done in just an hour. Picture twinkling stars and a glowing crescent moon illuminating your little garden. This theme invites a sense of wonder and serenity, perfect for any space, big or small.
To start, gather some simple materials. You will need small fairy lights, star-shaped decorations, a mini crescent moon, and some delicate flowers or plants. The lights will serve as stars, while the moon adds that dreamy element. Make sure to choose plants that can thrive in your chosen environment, whether indoors or outdoors.
Here’s how to create your own Celestial Night Sky:
- Choose a Container:Select a pot or a shallow container to act as your garden base.
- Plant Flowers:Start by planting small flowers or greenery at the base to mimic the earth. White or light-colored flowers work best to reflect the lights.
- Add Lights:Place fairy lights throughout the garden, arranging them to look like stars in the night sky.
- Include the Moon:Position your mini crescent moon in a prominent spot within your garden, ensuring it catches the eye.
- Decorate with Stars:Scatter star-shaped decorations around the plants to enhance the starry theme.
Your Celestial Night Sky is now ready!
Fairy Bridge Over Stream
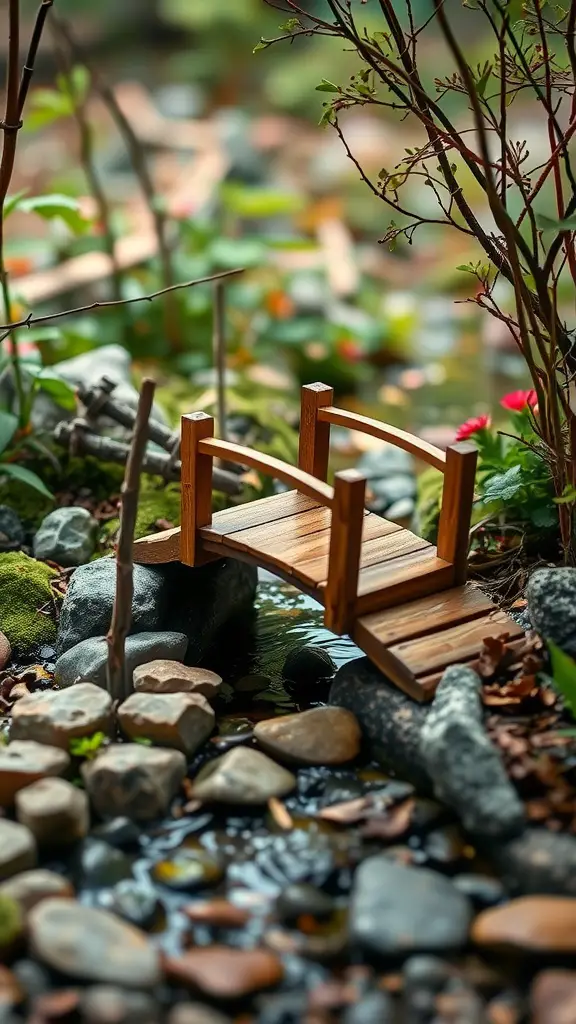
Creating a fairy bridge over a stream can bring a magical touch to your miniature garden. Picture a small wooden bridge arching gracefully over a tiny flowing stream, surrounded by pebbles and vibrant greenery. This setup not only enhances the visual appeal but also sparks the imagination.
To build your own fairy bridge, you will need some basic materials. Gather small wooden sticks or craft popsicle sticks for the bridge. For the stream, use a shallow container filled with water, or simply create a small trench in your garden bed. Add pebbles around the stream to give it a natural look.
To assemble, start by creating your stream bed with pebbles. Place your wooden bridge across it and secure it with a bit of glue if needed. Then, decorate around the bridge according to your chosen theme. This simple project can be completed in no time and adds charm to your fairy garden!
Tiny Fairy Library

Create a charming Tiny Fairy Library that invites imagination and creativity. This delightful setup features a miniature bookshelf filled with tiny books, a cozy reading chair, and a welcoming atmosphere.
To build your own Tiny Fairy Library, start with the basic materials: a small wooden box or a dollhouse structure to serve as the library. Next, gather miniature books or create your own using cardboard. For a touch of whimsy, you can add a tiny chair and a small table for reading.
Finish it off by arranging smooth pebbles or artificial grass around the library. This will enhance the fairy garden feel and provide a cozy spot for tiny fairies to enjoy their books!
Petal-Powered Carousel
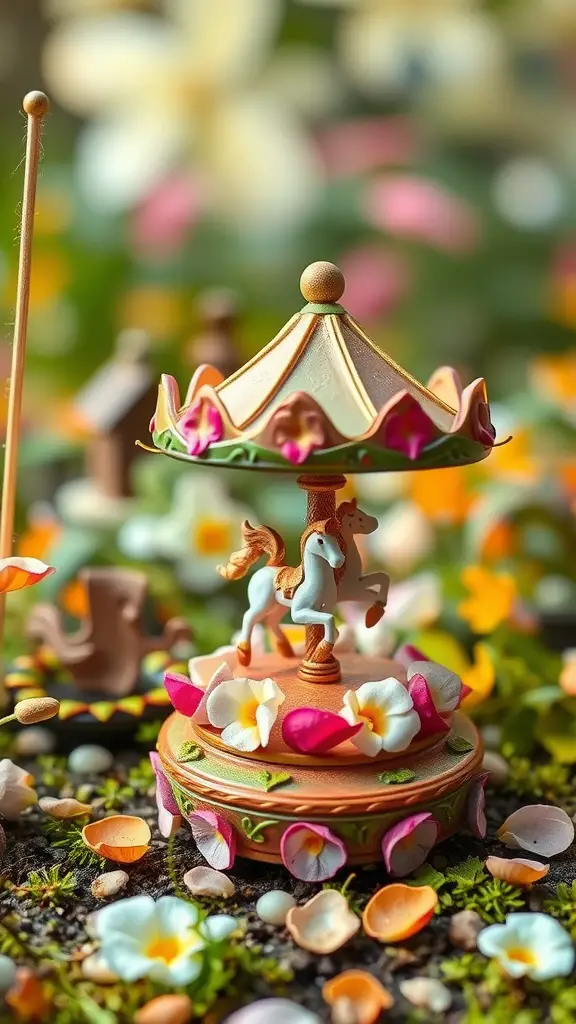
The Petal-Powered Carousel is a delightful addition to any mini fairy garden. This charming piece features tiny unicorns riding in a whimsical carousel, surrounded by beautiful petals and vibrant flowers. It brings a sense of magic and joy to your miniature landscape.
To create your own Petal-Powered Carousel, you’ll need a few materials. Start with a small carousel figurine, which can be found at craft stores or online. Gather some artificial flowers and petals to decorate the base. You can even use tiny pebbles or moss to add texture.
Here’s a simple step-by-step process to make it: First, secure the carousel in the center of your chosen container. Next, arrange the artificial flowers and petals around the base to create a colorful border. For added charm, sprinkle some tiny pebbles or moss around the carousel. This will give it a more natural look, blending perfectly with your fairy garden theme.
Cottage by the Sea

This charming scene captures a cozy cottage by the sea, perfectly designed for a mini fairy garden. The little house is adorned with a lovely porch and vibrant details. Surrounding it are tiny seashells, colorful pebbles, and playful starfish, all nestled in a bed of sand.
To create your own beach paradise, start with the right materials. You’ll need sand, tiny seashells, and decorations like miniature starfish and a cute cottage. Find a shallow container to serve as the base for your garden.
Begin by filling the container with sand to create a beach-like foundation. Arrange the seashells and pebbles around the cottage. For extra charm, place some beach-themed decorations nearby. If you want to go for an enchanted forest look, add moss, twigs, and woodland animal figurines instead. Or, for a splash of color, create a rainbow wonderland with colorful flowers and painted rocks.
Rustic Log Cabin
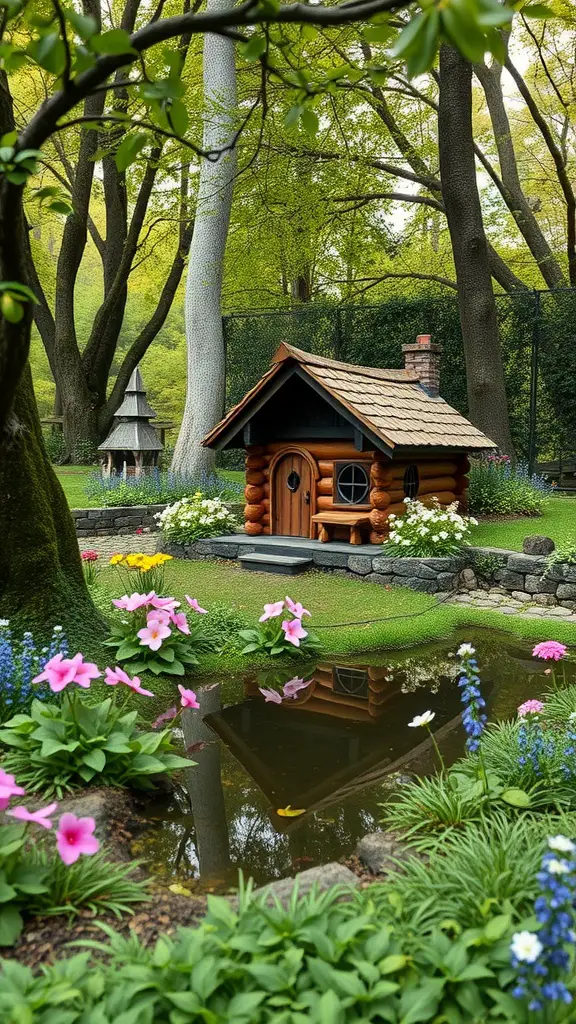
A rustic log cabin can bring a cozy feel to your mini fairy garden. This charming structure can be the perfect centerpiece, nestled among colorful flowers and greenery. Imagine tiny fairies resting on the porch or peeking out the window!
To create your own rustic log cabin, you’ll need some small logs or sticks, a hot glue gun, and a piece of wood for the base. Start by building the walls with the logs, gluing them together to form a square or rectangular shape. Attach a sloped roof made from smaller sticks or cardboard to complete the cabin look.
Surround your cabin with vibrant flowers. You can use pink impatiens, bluebells, and bright daisies to add a pop of color. Lay down some moss or pebbles for a natural feel. If you want to add a water element, a small dish filled with water can mimic a pond, reflecting the beauty of your cabin.
Crystal Cove Retreat
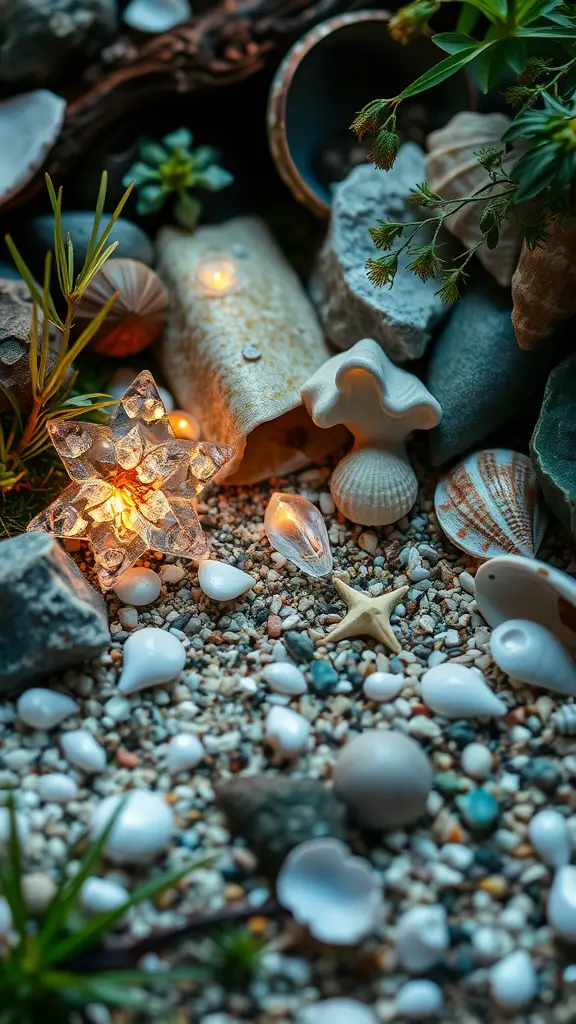
Imagine a mini fairy garden that captures the essence of a beach day. The Crystal Cove Retreat idea uses natural materials to create a stunning scene. Start with a base of sand and small pebbles, representing the shoreline. Add tiny seashells and a starfish for that authentic beach feel.
To illuminate your retreat, place fairy lights or a glowing star decoration amidst the stones. This will add a magical touch, especially in the evening. Surround the sandy area with small plants or greenery that mimic beach grass, giving your garden a lively vibe.
Hidden Fairy Waterfall
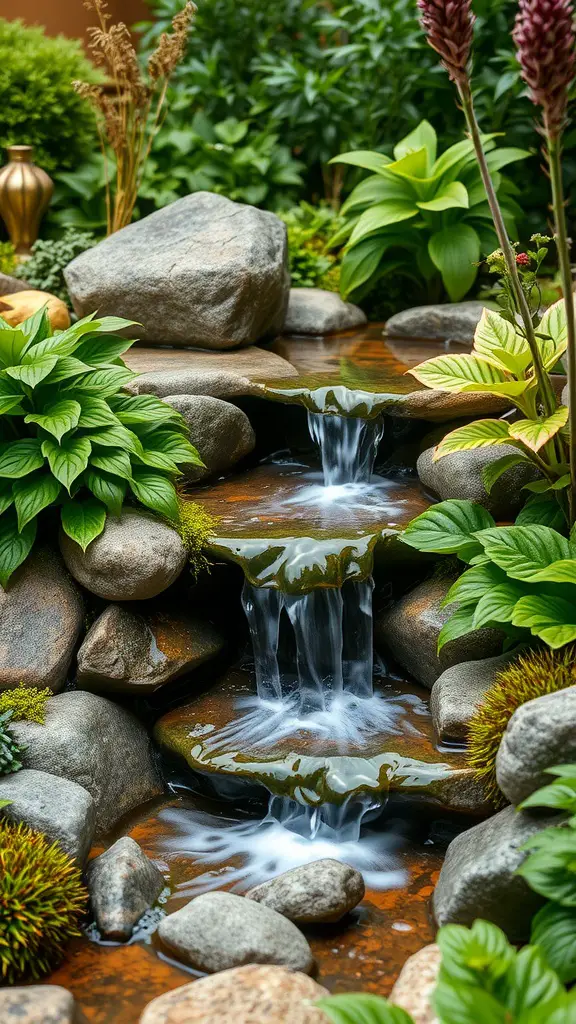
Imagine a miniature waterfall tucked away in your fairy garden, creating a serene spot for your little magical friends. A hidden waterfall adds charm and whimsy, making the garden feel alive. The gentle sound of water flowing can transport you and your guests to another world.
To create your own hidden fairy waterfall, you’ll need a few materials. Start with small rocks and pebbles to form the base. A water feature pump can help to circulate the water. You’ll also want some leafy plants to surround your waterfall for that lush, enchanted forest feel.
Here’s a simple step-by-step process:
Choose a spot for your waterfall that complements your garden layout.
Arrange the rocks in a tiered fashion to create a cascading effect.
Place the pump at the base and connect it to a small reservoir or tub that will hold the water.
Add water and test the pump to ensure the water flows smoothly over the rocks.
Finish by surrounding the area with plants, moss, and maybe even a tiny fairy figurine peeking out.
Merry Berry Patch
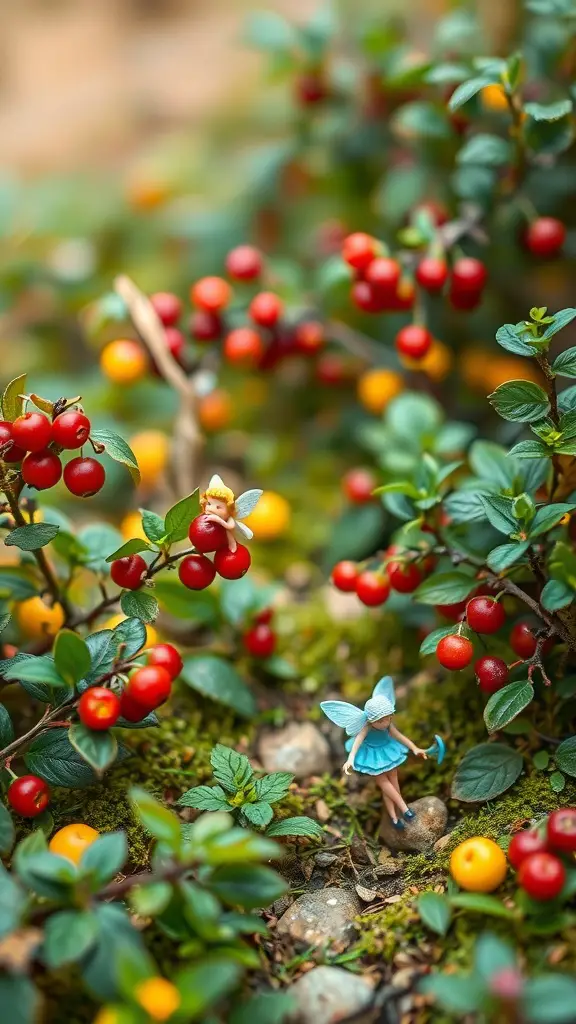
The Merry Berry Patch is a delightful mini fairy garden that captures the charm of a lush berry-filled landscape. This scene features bright red and yellow berries nestled among vibrant green leaves, creating a cheerful setting for any fairy enthusiast. A tiny fairy figure adds a whimsical touch, enhancing the magical vibe.
To create your own Merry Berry Patch, you’ll need simple materials. Start with a small container or a patch of soil in your garden. Gather some colorful artificial berries or even real ones like cherry tomatoes for a realistic look. You can also include moss to create a soft base that mimics the forest floor.
Here’s a step-by-step guide to build your mini fairy garden:
Choose your base: Use a small pot, wooden box, or section of your garden.
Add soil or moss: Spread a layer of soil or moss to create a natural feel.
Arrange the berries: Position your artificial or real berries in clusters, mixing colors for visual appeal.
Place your fairy: Find a charming fairy figurine and place her among the berries.
Finish with decorations: Add small stones or other natural elements to complete the look.
Garden Party Delight
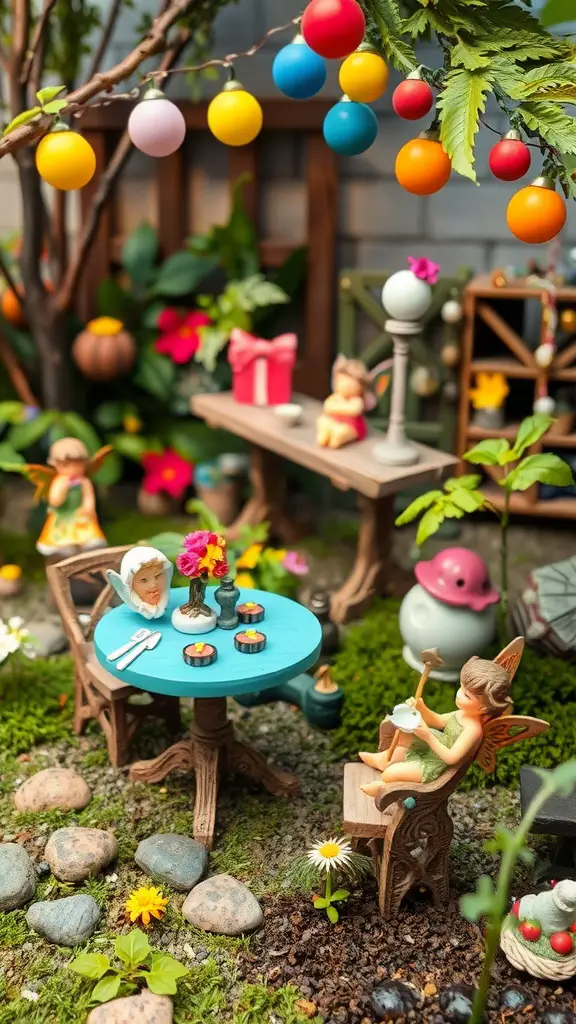
This lovely fairy garden scene captures the joy of a garden party. Tiny decorations and colorful elements create a playful atmosphere. A bright blue table is set for two, complete with miniature plates and a charming flower arrangement. Nearby, cheerful fairy figurines enjoy the delightful setting, adding a whimsical touch.
To bring this fairy garden idea to life, you’ll need some simple materials. Start with a small container or a section of your garden. Gather soil, pebbles, and moss to create the base. Add in fairy figurines and a small table, like the one in the image. You can decorate the table with tiny dishes and flowers.
Land of the Fairies
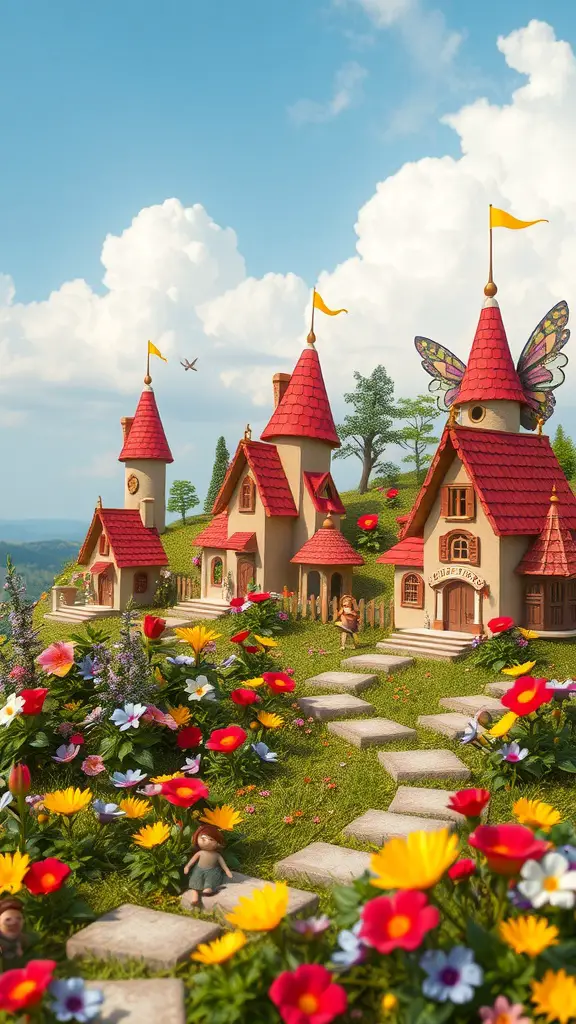
The image presents a charming fairy garden that feels like a magical village. Colorful flowers bloom in every direction, framing whimsical homes that invite your imagination. Each tiny house, complete with red roofs and cheerful flags, looks like it belongs to a fairy. The path made of stones leads you right into this enchanting scene.
You can easily recreate this fairy garden at home. Start with a base of soil or a small container. Then, gather tiny decorations like miniature houses, flowers, and figurines to bring your fairy garden to life.
Miniature Fairy Circus

Imagine a lively miniature circus right in your garden! This fairy circus is filled with cheerful characters and vibrant colors. The striped tents invite visitors to enjoy the magic of the show. Tiny fairy figurines add a playful touch, making it feel like a celebration.
To create your own miniature fairy circus, gather some basic materials. You’ll need striped fabric or paper for the tents, small figurines, and a base of gravel or soil. Arrange the tents in a circular pattern, and place the figurines around them. Add pebbles to form a path, giving it an authentic circus feel.
Fairy Lantern Festival
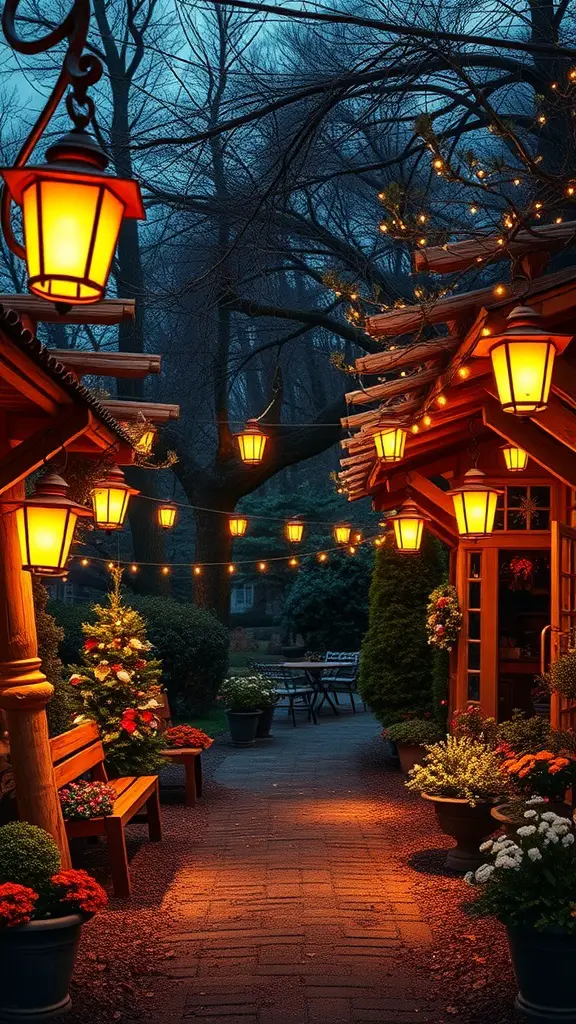
The Fairy Lantern Festival brings a magical touch to any garden. Imagine a pathway lit with charming lanterns, guiding you through a whimsical world. The warm glow creates a cozy atmosphere, perfect for gathering with friends or simply enjoying a quiet moment.
To recreate this enchanting scene in your mini fairy garden, start by gathering materials. You’ll need small lanterns or fairy lights, decorative pebbles, and potted plants like colorful flowers or small trees. Arrange the lanterns along a pathway made of pebbles, creating a route that feels inviting.
Old World Charm

The image beautifully captures an enchanting mini fairy garden filled with delightful details. The charming setup features quaint little buildings, ornate lanterns, and a colorful array of flowers, creating a warm and inviting space.
To craft your own Old World Charm fairy garden, gather materials like small wooden houses, decorative lanterns, and vibrant faux flowers. You can use a variety of pots to add different heights and textures for visual interest.
Start by arranging the larger elements like the houses and lanterns, ensuring they complement each other. Next, place the flowers around them, making sure to mix colors for a lively feel. This layout gives a nod to classic garden aesthetics while keeping it whimsical.
Garden of Seven Wonders
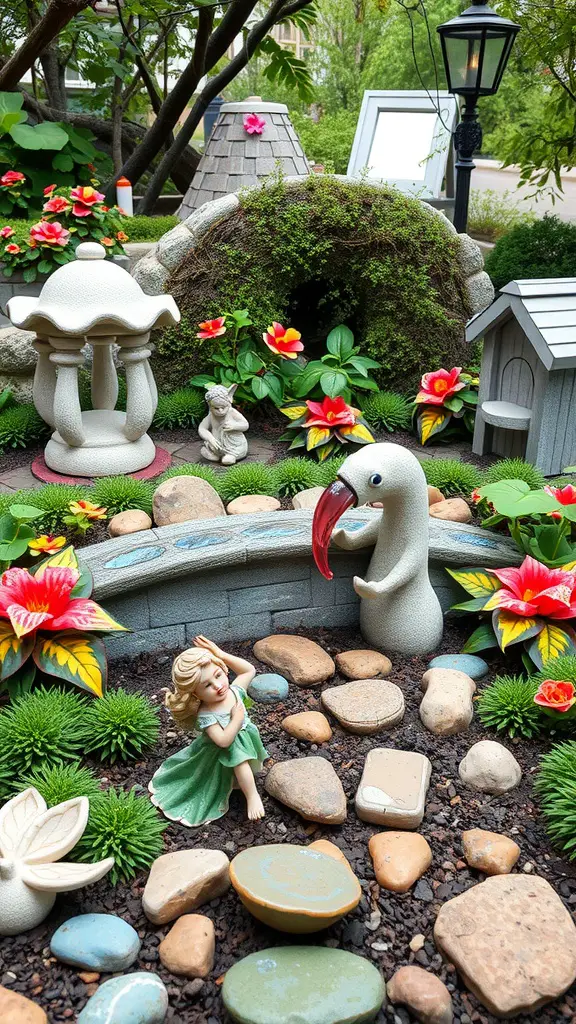
Picture a delightful mini fairy garden, brimming with charm and character. This enchanting setup features a mix of colorful flowers and playful decor that invites imagination. At the center, a sweet figurine dances across smooth stones, surrounded by lush greenery.
To create a similar garden, gather materials like small stones, vibrant flowers, and charming figurines. Start by selecting a container or a small plot of soil. Arrange the stones to form a winding path, just like in the image. Next, place your flowers around the sides, ensuring a pop of color that draws the eye.
For extra flair, consider adding themed elements. If you’re going for a Beach Paradise, include sand and seashells. For an Enchanted Forest, use moss and woodland animal figurines. Or, create a Rainbow Wonderland with colorful flowers and painted rocks.
These gardens not only look stunning but can also be a fun project to complete in about an hour. So gather your materials, unleash your creativity, and let your fairy garden bloom!
Fairy Tale Book Nook
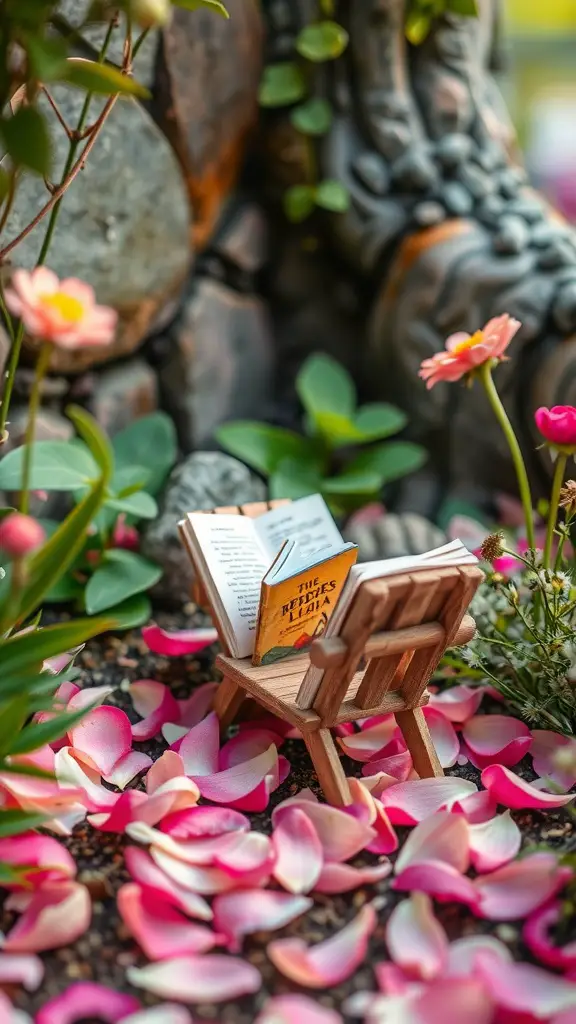
Create a charming fairy tale book nook to spark your imagination. This mini garden features a tiny wooden chair and an open book, perfect for a fairy to take a break and read in peace. The scattered pink petals add a soft touch, making the space inviting and magical.
To build your own fairy tale nook, you’ll need a few materials. Start with a small container or a patch of soil. Gather decorative elements like a tiny chair and a miniature book. You can also add flower petals or moss to create a cozy atmosphere. Don’t forget to sprinkle in some small rocks or pebbles for texture!
To get started, simply arrange your container. Place the chair and book in a way that feels inviting. Surround it with petals or moss for a whimsical touch. You can also incorporate fairy lights or small figurines to enhance the magical feel.
Pixie Dust Playground
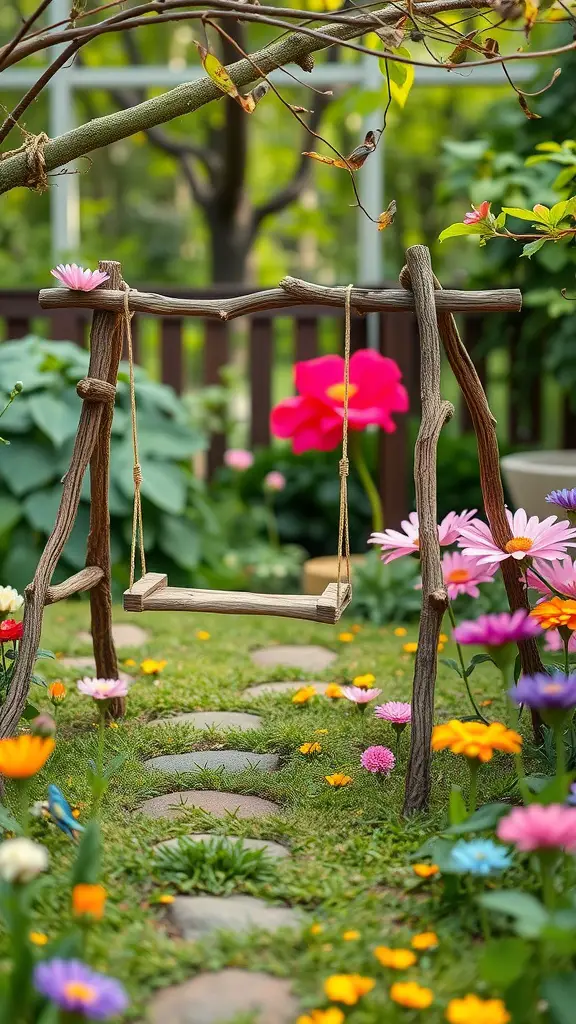
Welcome to the Pixie Dust Playground! This enchanting mini fairy garden features a charming swing made from twigs, nestled among vibrant flowers. The lush greenery and colorful blooms create a delightful scene that sparks imagination. It’s a perfect spot for tiny fairies to play and relax.
To recreate this magical garden, you’ll need a few materials. Start with small twigs for the swing. Gather some sturdy branches to form the swing’s frame. Use a piece of wood for the seat and attach it with twine or string.
For the base, consider using soft moss or grass. Lay down some small stones to create winding paths through your garden. You can then plant colorful flowers like daisies and marigolds around the swing to add pops of color.
These gardens not only look stunning but can also be a fun project to complete in about an hour. So gather your materials, unleash your creativity, and let your fairy garden bloom! For more tips and a full guide on creating your own magical mini garden, check out our post on How to Create a DIY Mini Fairy Gardens: A Magical Outdoor Craft for Kids.