As a mom of two, I know how special and heartwarming it is to celebrate a new little life. Baby showers are a perfect opportunity to gather loved ones, share laughter, and of course, enjoy delicious treats. One of my favorite ways to add a personal and creative touch to these events is by making themed cookies. Today, I want to walk you through how to make “Baby in Bloom” cookies—beautiful, floral-inspired cookies that are almost too pretty to eat but so easy to make!
Before we dive into the step-by-step process of making these gorgeous cookies, watch this quick video for some creative inspiration and helpful tips to get started!
Why “Baby in Bloom” Cookies Are Perfect
Baby in Bloom cookies are not just a sweet treat; they’re a lovely way to match a floral or garden-themed baby shower. These cookies can serve as a beautiful centerpiece, party favor, or an elegant addition to a dessert table. Plus, making them yourself adds a heartfelt touch that everyone will appreciate.
I promise, you don’t need to be a professional baker to pull these off. With a little patience, some simple ingredients, and a bit of creativity, you’ll be amazed at how stunning these cookies turn out.
What You’ll Need

Here’s a list of ingredients and tools to get started. I like to gather everything beforehand so I’m not scrambling mid-recipe.
Ingredients for the Cookies
- 2 ½ cups all-purpose flour
- 1 cup unsalted butter (softened)
- 1 cup granulated sugar
- 1 large egg
- 1 tsp pure vanilla extract
- ½ tsp almond extract (optional for a more delicate flavor)
- ½ tsp salt
Ingredients for the Royal Icing
- 4 cups powdered sugar
- 3 tbsp meringue powder
- 5-6 tbsp water (adjust for consistency)
- Food coloring (pastel shades like pink, yellow, lavender, and mint green work beautifully)
Decorating Supplies
- Flower-shaped cookie cutters (various sizes)
- Small round cookie cutter (for baby face or smaller flowers)
- Piping bags
- Piping tips (round and leaf tips)
- Edible markers (optional for baby face details)
- A small palette knife or offset spatula
Step 1: Making the Cookies
The foundation of any beautifully decorated cookie is a sturdy, buttery base. I use my go-to sugar cookie recipe because it holds its shape well and tastes amazing.
1. Cream Butter and Sugar
In a large bowl, cream the softened butter and sugar together until light and fluffy. This usually takes about 2-3 minutes with a hand or stand mixer.
2. Add Egg and Flavoring
Beat in the egg, vanilla extract, and almond extract if using. These flavors give the cookies a delicate, floral hint that pairs perfectly with the theme.
3. Mix Dry Ingredients
In a separate bowl, whisk together the flour and salt. Gradually add the dry ingredients to the wet ingredients, mixing just until combined.
4. Chill the Dough
Form the dough into a disc, wrap it in plastic wrap, and chill it in the refrigerator for at least an hour. This step is crucial for keeping the cookies from spreading in the oven.

5. Roll and Cut
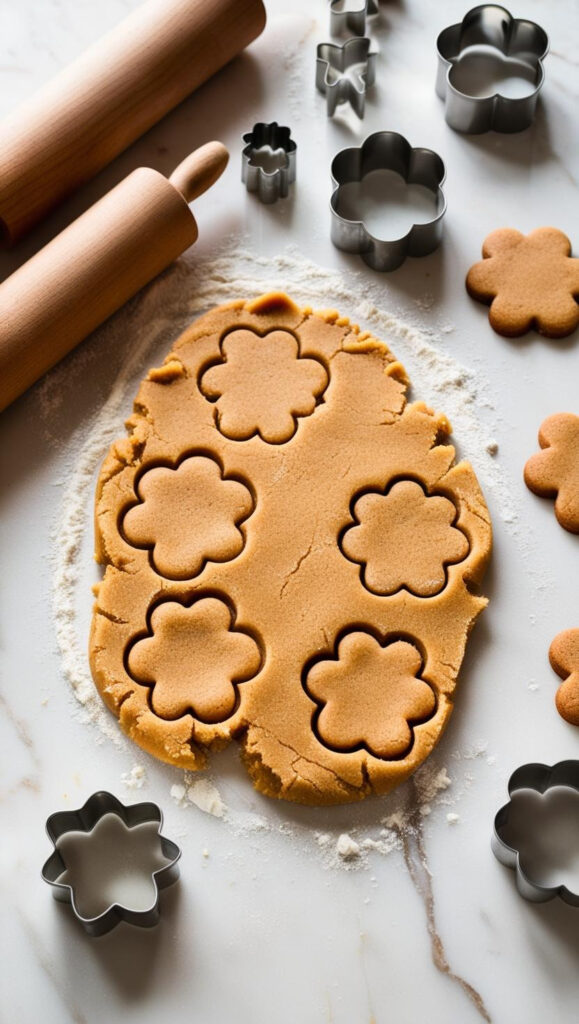
Preheat your oven to 350°F (175°C). Roll out the chilled dough on a floured surface to about ¼-inch thickness. Use the flower-shaped cookie cutters to cut out cookies. If you’re adding a baby face in the center, use a small round cutter to create space for it.
6. Bake
Place the cookies on a parchment-lined baking sheet and bake for 8-10 minutes, or until the edges are just starting to turn golden. Let them cool completely before decorating.
Step 2: Preparing the Royal Icing
Royal icing can be intimidating, but with a little practice, it’s incredibly fun to work with.
1. Mix the Icing
In a large bowl, combine the powdered sugar, meringue powder, and water. Mix on low speed until combined, then increase the speed to medium-high and beat until stiff peaks form (about 5 minutes).
2. Adjust Consistency
Divide the icing into bowls and add water, a teaspoon at a time, to achieve the right consistency for flooding (smooth and flowy) or piping (stiff enough to hold shape).
3. Add Color
Mix in food coloring to create your desired pastel shades. Remember, a little goes a long way!
Step 3: Decorating the Cookies
Now for the fun part—decorating! I recommend decorating in layers and letting each layer dry before adding the next to prevent smudging.
1. Base Layer
Use the flooding consistency icing to outline and fill each flower cookie. For a clean edge, pipe the outline first, let it set for a minute, then flood the center. Use a toothpick to smooth out any bubbles.
2. Add Flower Details
Once the base is dry (this can take 30 minutes to an hour), use stiffer icing to pipe flower petals, leaves, or other details. A leaf tip works great for leaves, and a small round tip is perfect for dots or baby face features.
3. Baby Face Center
For the baby face, use a small round cookie or draw directly onto the flower cookie. Use edible markers to add eyes, a tiny nose, and a sweet smile. If you’re feeling adventurous, pipe a little bow or a floral crown for an extra touch.

4. Finishing Touches
Dust the cookies with edible glitter or pearl dust for a magical shimmer. You can also use tiny sugar pearls to accentuate the flowers.

Step 4: Displaying the Cookies
Presentation makes a world of difference, especially at a baby shower. Arrange your Baby in Bloom cookies on a tiered tray or a large, white platter to let the colors pop. You can also wrap individual cookies in cellophane bags tied with ribbon for guests to take home as favors.

Tips and Tricks from My Kitchen
- Practice Makes Perfect: If this is your first time using royal icing, practice your piping skills on parchment paper before decorating the cookies.
- Don’t Skip the Chill: Chilling the dough prevents spreading and helps maintain the beautiful flower shapes.
- Plan Ahead: Make the cookies a day or two in advance and store them in an airtight container. Decorate them the night before the event for the freshest results.
- Get the Kids Involved: My little ones love helping with simple tasks like mixing icing or adding sprinkles. It’s a fun family activity!

Why These Cookies Matter
For me, Baby in Bloom cookies aren’t just another dessert; they’re a labor of love. Each one is a small gesture that says, “We’re celebrating something precious.” Whether it’s for a close friend, a sibling, or your own little one, these cookies add a thoughtful, personal touch that store-bought treats just can’t replicate.
So, the next time you’re planning a baby shower, give these cookies a try. Trust me, the smiles and compliments you’ll receive will make all the effort worthwhile.
If you decide to make these cookies, I’d love to hear how they turned out! Share your experiences or any creative twists you added. Let’s inspire each other to make life’s sweet moments even sweeter.


